Integrating the EventSentry tray app "EventSentray" with OTRS Ticket system via email
OTRS is another popular IT helpdesk ticket system. Starting with version 4.2, EventSentry includes the tray icon feature which supports integrating different IT helpdesk ticket systems so end users can easily open support tickets right from their workstation through a convenient tray icon. This guide illustrates how to integrate EventSentry with the OTRS Ticket System via an email action.
Steps:
- Checking the Queue configuration in the OTRS portal
- Creating and Configuring the OTRS email action
- Assigning the Action to the Tray Application
- Saving Configuration & Client Example
Checking the Queue configuration in the OTRS portal
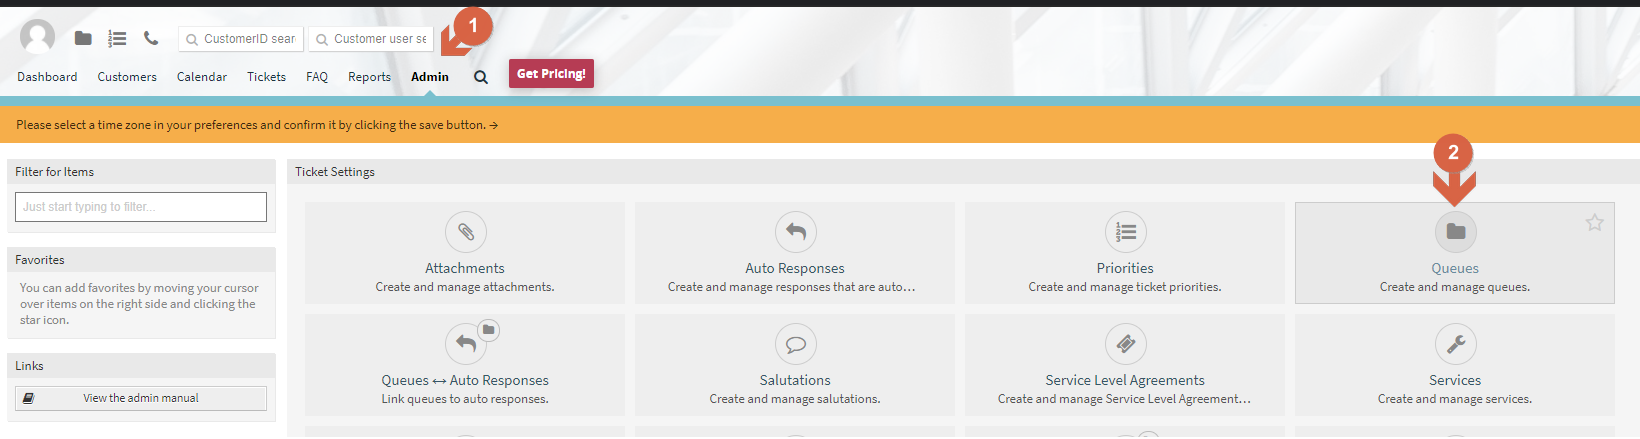
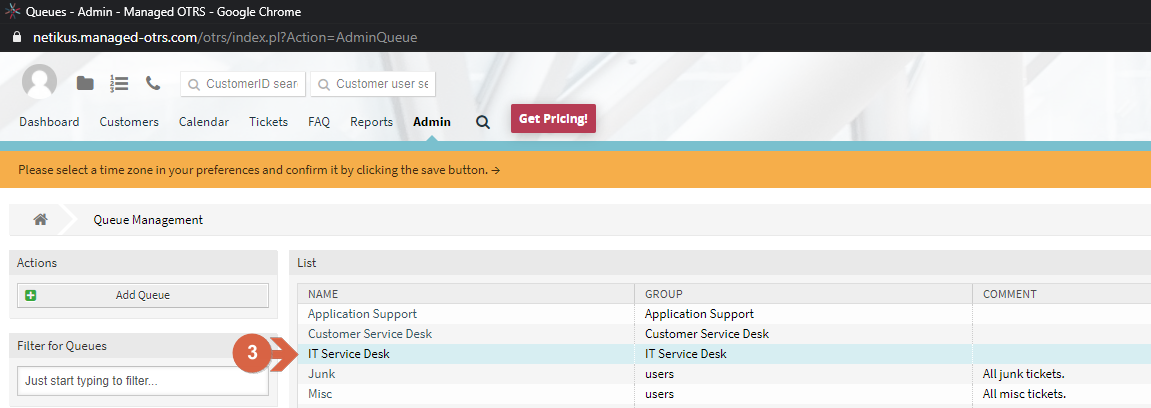
In the OTRS administration portal, navigate to the IT Service Desk Queue by clicking on the top menu admin (1), queues (2) and finally IT Service Desk (3) Check or modify the system address (4) which will be used later for the email action.


Creating and Configuring the OTRS email action
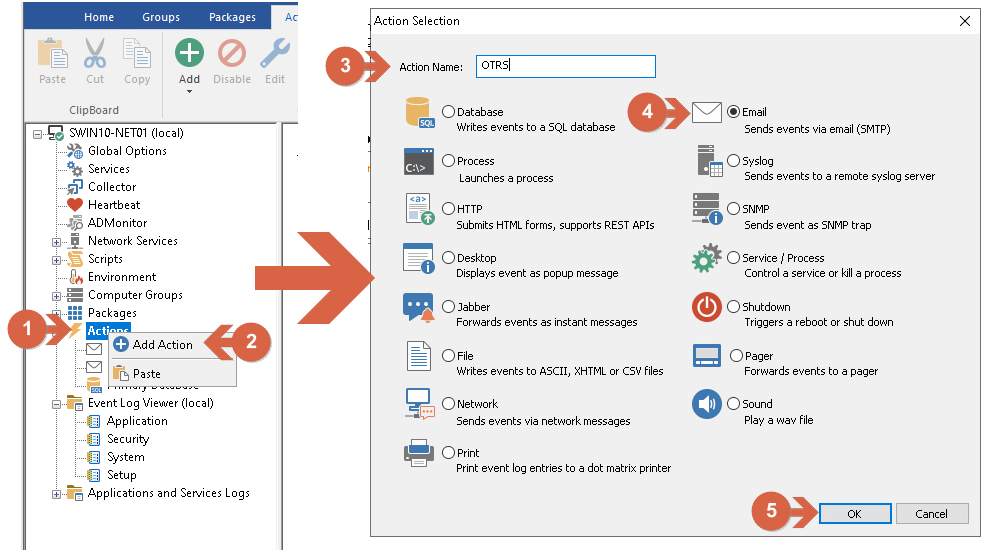
From the tree or ribbon, (right-) click on Actions (1) and select Add Action (2). In the Action Selection window, choose an action name (3), "OTRS" in this example, select Email (4) and click OK (5).
Creating an Email Action
After creating the email action the configuration window will appear.
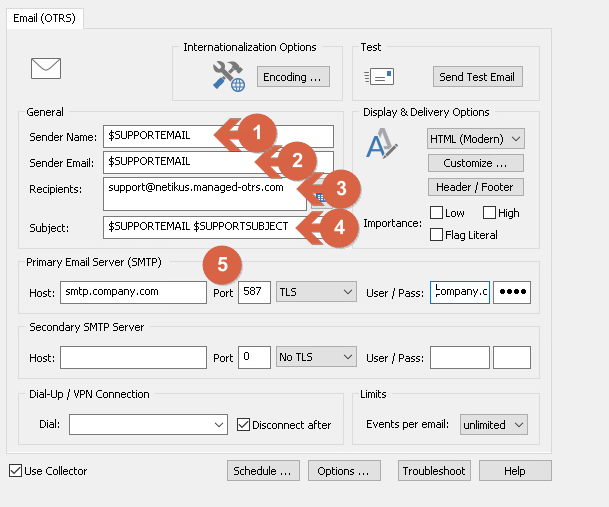
Note: Some configuration here depends on particular company email server configuration. For example, for this guide the $SUPPORTEMAIL variable is used as both the Sender and Email, which will be replaced by the user input in the tray icon. For that particular configuration, the specified SMTP server must allow the user in "User/Pass" to impersonate other users or sending emails will fail. If the SMTP configuration can't be modified to allow this, the same email address used in "User/pass" must be configured under "Sender Email". In any case, the user email can be added to the subject too.
At the Email Action configuration window for this guide, the $SUPPORTEMAIL variable (1) is used for the sender and sender email field (2). The recipient email address (3) is the one that we just checked at queues (suppport@netikus.managed-otrs.com in this example). Enter $SUPPORTEMAIL $SUPPORTSUBJECT for the subject (4). Complete SMTP information for your SMTP Server (5).
Configuring Email Action
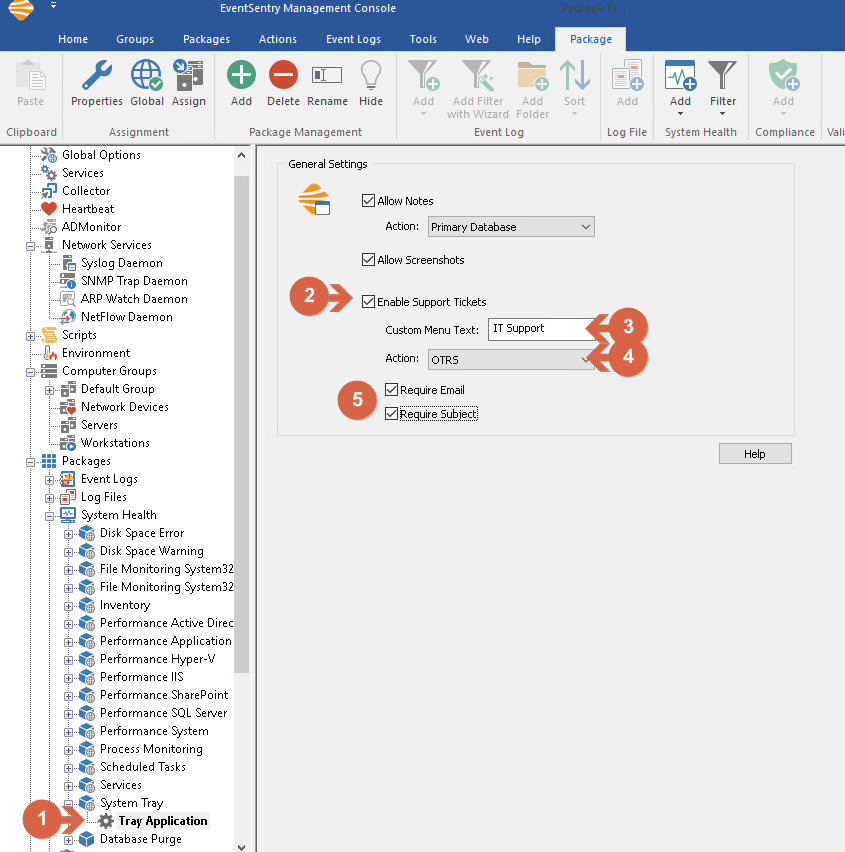
Assigning the Action to the Tray Application
After the action is created, the last step is to assign the action to the System Tray package. To do so, (1) under Packages / System Health / System Tray (1), click on Tray Application. From General Settings (2) activate Enable Support Tickets and specify a suitable link description (3) for your end users, e.g. IT Support, and then select the just created email action (OTRS) (4). Enable both the Require Email and Require Subject options (5).
If you don't have a System Tray package (e.g. when upgrading from pre-v4.2), simply create a new System Health package or add the Tray Application object to an existing system health package and configure it as described above.
Assigning Action to Tray Application.
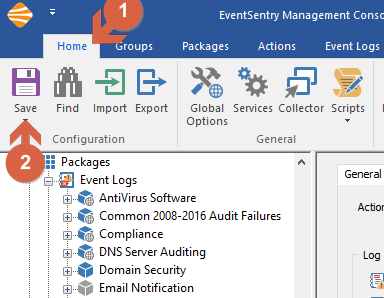
Saving Configuration & Client Example
From the top menu, click Home (1) and either click the "Save" or "Save & Deploy" icon (2). It may be necessary to manually push the configuration if the collector is not being used. Clients usually pickup the new configuration in a couple of minutes, after which the tray icon option should show up on all monitored hosts.
Save Configuration.

Right click on tray icon.
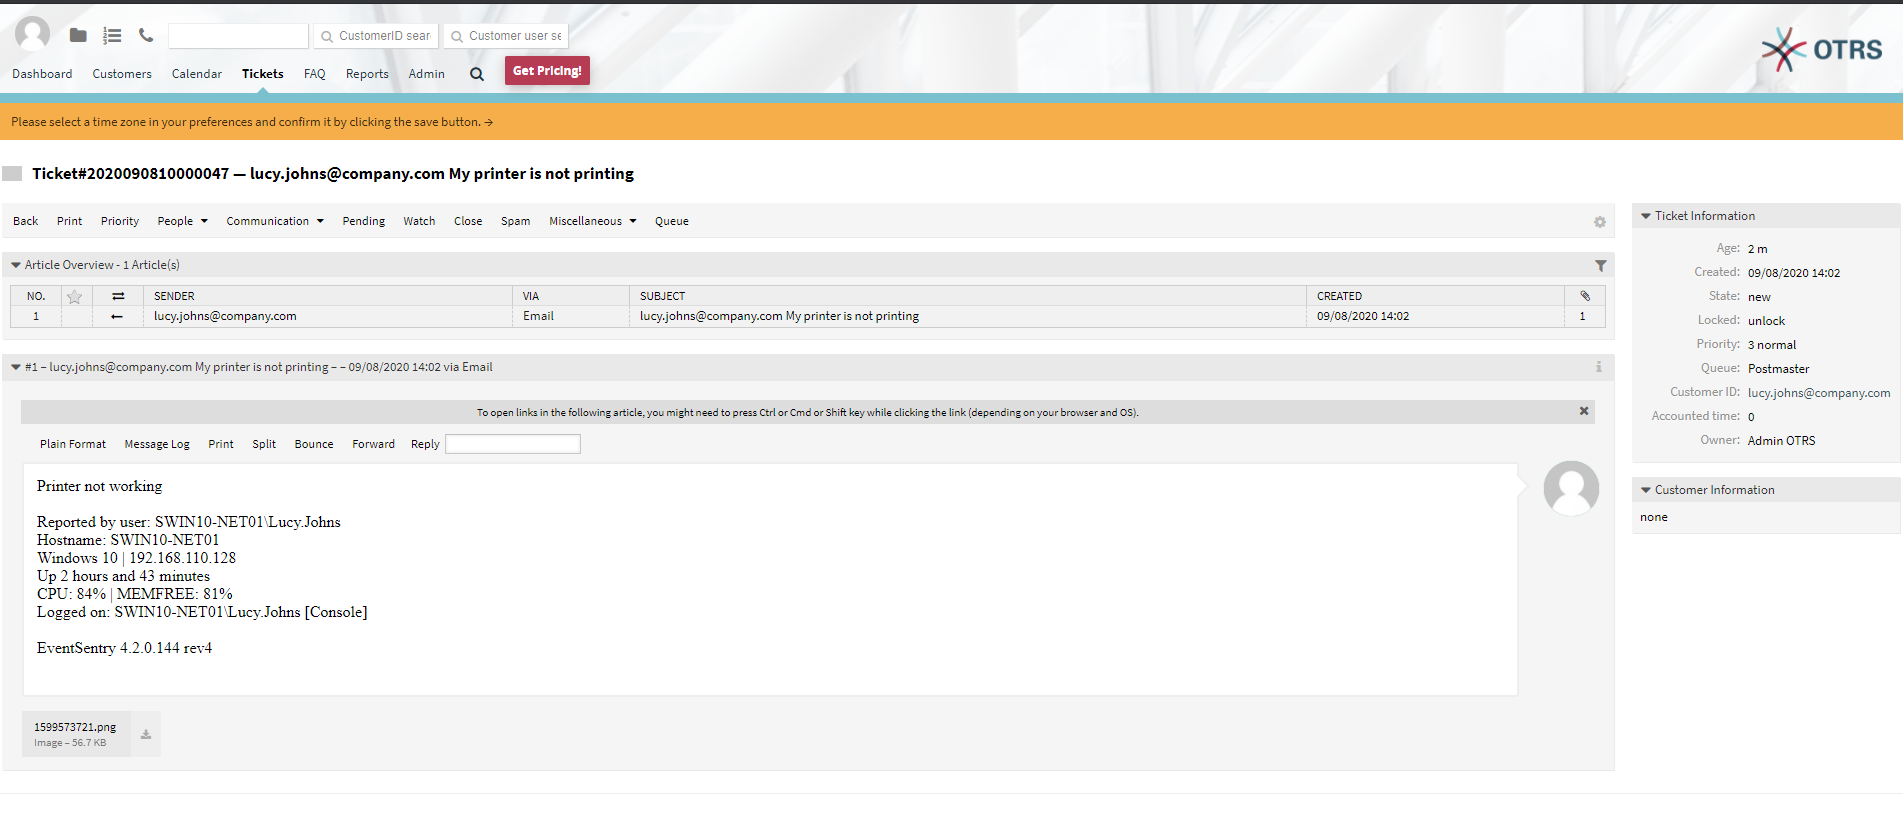
Ticket Creation Example.