Navigation: Installing EventSentry >
Installation


|
Navigation: Installing EventSentry > Installation |
|
|
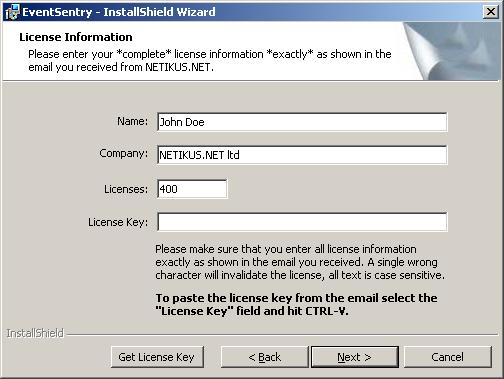
This step is quite simple once you have the previous steps completed. Double click on the installer to begin the install. Once you accept the license agreement, you will be asked for your license information.
Please note that all the information must match EXACTLY. All fields, including name and company name, are case sensitive.
Click Next to start entering your environment's information.
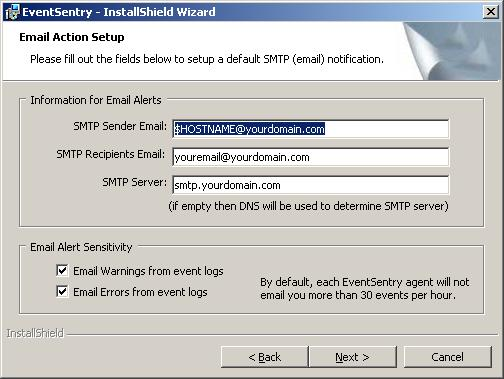
By leaving the $HOSTNAME variable in the sender email, you can see which machine the email is coming from. For instance, if your server named DCCHI1 sends an email alert, it will come from DCCHI1@yourdomain.com
I also recommend leaving the two check boxes at the bottom selected. You can start excluding events you do not want to see later on. Click Next to choose the components to install.
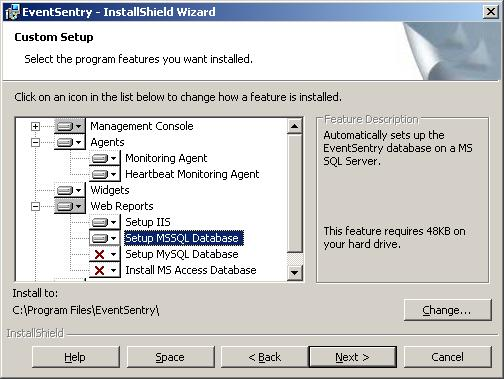
Here I kept the defaults but also added the "Widgets", "Setup IIS", and "Setup MSSQL Database" features. This will get us everything we need to use all the features. Click on Next to continue.
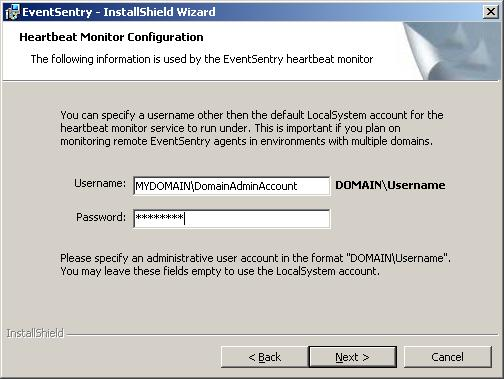
Now we need to tell EventSentry which account to run the heartbeat service under.
The EventSentry Heartbeat Service makes sure that the EventSentry service is running on your remote machines. Because of this, it needs permissions to query them. We recommend using a domain admin account to run this service under. Please make sure it is a valid account before proceeding, or the installer will fail later on. If you are unsure about which account to use here, then simply leave both fields empty. You can configure the user account the EventSentry Heartbeat Monitor is running under later on.
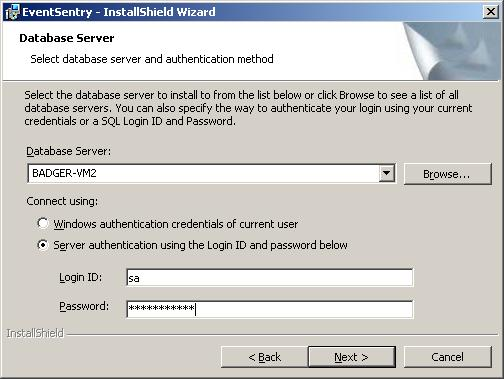
Next we need to tell EventSentry about our database.
Even though this machine is running on the local host, you must use the actual Windows name of the computer (or IP). If you do not, each of the agents are going to try writing to localhost which of course would be themselves, not this machine.
You should also make sure to enter the "sa" account and password for the authentication. This way you can be sure the installer has the permissions needed to create all objects in the database.
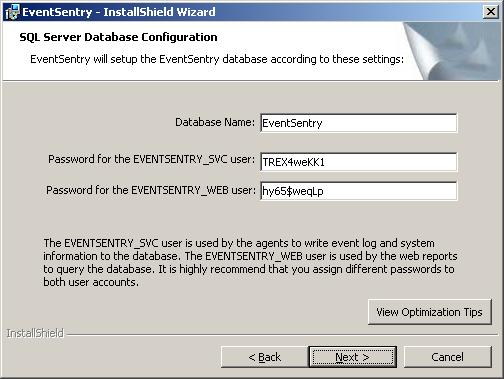
This is the database EventSentry will create and use on your server. We recommend leaving the default "EventSentry" for the "Database Name", but it can of course be changed.
The next two lines show the SQL users that will be created. The EVENTSENTRY_SVC account is used by the agents to write to the database, whereas the EVENTSENTRY_WEB account is used by the web reports to read from the database. We recommend using a different password for each one, but that is up to you.
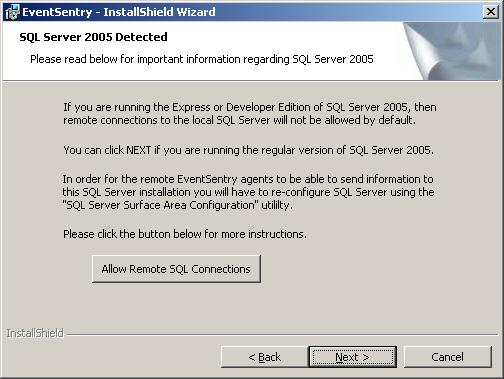
Next you get this warning:
We took care of this right away with the SQL Configuration Manager. We are ready to continue so you can just click Next.
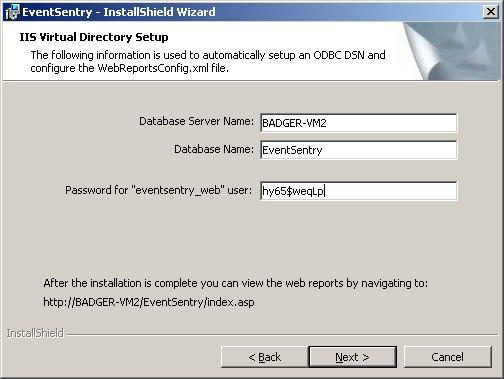
Now the web reports need to be configured as well.
It should already have correctly entered the information from our earlier input. You can click Next if it all looks correct.
Click on the Install button and it should complete successfully in a few minutes. Once it is done, hit Finish and you are ready to start using EventSentry!
Once you have this up and running, please check out our screen casts located here:
http://www.eventsentry.com/support_screencast.php
They are a quick way to get up and running and I highly recommend spending some time on them. It will make your EventSentry experience much more smooth.
If you have any questions, please contact us at support@netikus.net and we would be glad to help you out. |