|
Encrypting Network Traffic with MSSQL --------------------OLD_TEXT--------------------- Encrypting Network Traffic with MSSQL --------------------OLD_TEXT--------------------- Encrypting Network Traffic with MSSQL |
Scroll Prev Top Next More |
Most ODBC drivers, including Microsoft SQL Server®, transmit network traffic in clear text which can be a problem in security sensitive environments. Microsoft SQL Server® supports protocol encryption which encrypts all traffic between the client (=EventSentry agent) and the Microsoft SQL Server®.
Using protocol encryption requires the following prerequisites:
•Certificate Services installed on machine running in your domain
•Latest SQL Server ODBC drivers installed on all clients (Microsoft® ODBC Driver 13.1 for SQL Server)
This chapter will guide you through the process of setting up Active Directory Certificate Services and requesting a certificate so that SQL server can use protocol encryption. This chapter is based on using Windows Server 2016 for the OS and Microsoft SQL Server® 2016/Microsoft SQL Server® 2019 for the database
1. Installing Certificate Services
You will only need to follow these steps if you do not have certificate services running in your domain. If you already have a certificate server in your domain then you can skip step 1.
Navigate to "Start -> Administrative Tools -> Server Manager -> Manage -> Add Roles and Features":

Which will launch the “Add Roles and Features Wizard” similar to this:
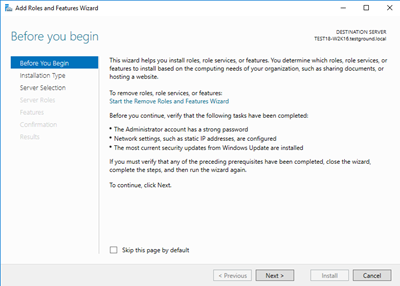
Step-by-step instructions for installing the Active Directory Certificate Services
2. Configuring the MMC snap-in
In order to manage/create certificates you need to configure an MMC for the certificate services. To open the Certificates snap-in, follow these steps:
•To open the MMC console, click Start, and then click Run. In the Run dialog box type: mmc
•On the Console menu, click Add/Remove Snap-in....
•Click Add, and then click Certificates. Click Add again.
•You are prompted to open the snap-in for the current user account, the service account, or for the computer account. Select the Computer Account.
•Select Local computer, and then click Finish.
•Click Close in the Add Standalone Snap-in dialog box.
•Click OK in the Add/Remove Snap-in dialog box. Your installed certificates are located in the Certificates folder in the Personal container.
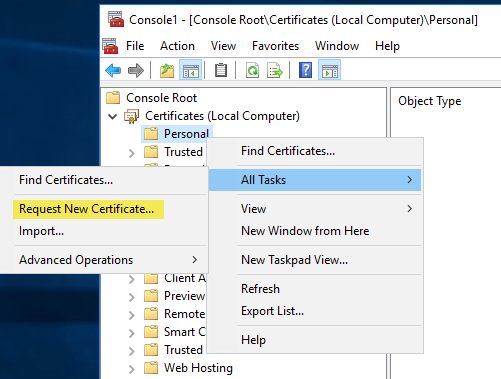
3. Installing a certificate on the server
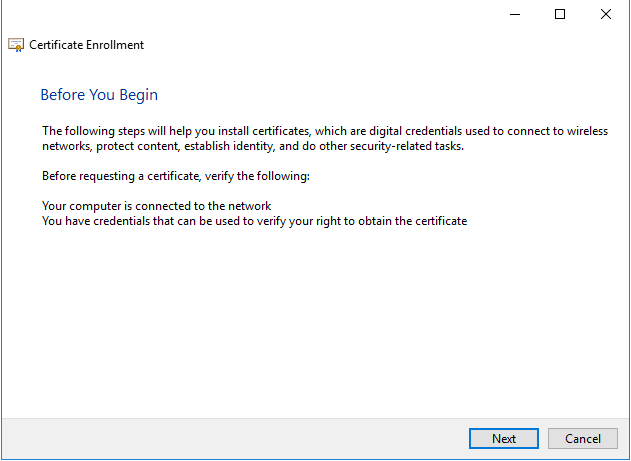
In the MMC, click to select the Personal folder in the left-hand pane. Right-click in the right-hand pane, point to All Tasks, and then click Request New Certificate....which will bring up the dialogs shown below:
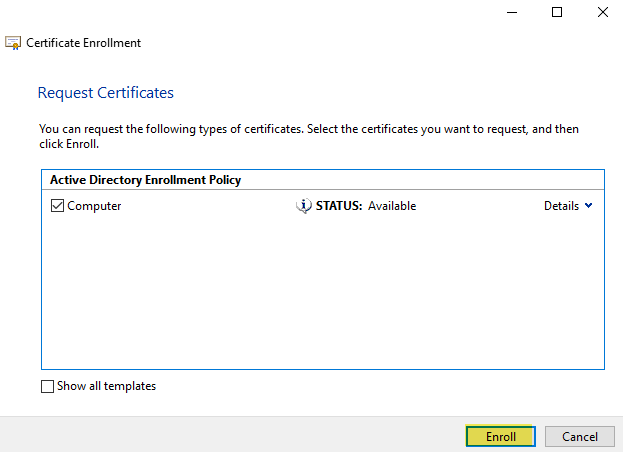
The Certificate Request Wizard dialog box opens. Click Next. Select Computer as the Certificate type.
After the wizard finishes, you will see the certificate in the folder with the fully qualified computer domain name.
4. Requiring database encryption for all communication
Once the certificate is installed you can configure the SQL Server to "Force protocol encryption".
• For SQL Server 2016/2019
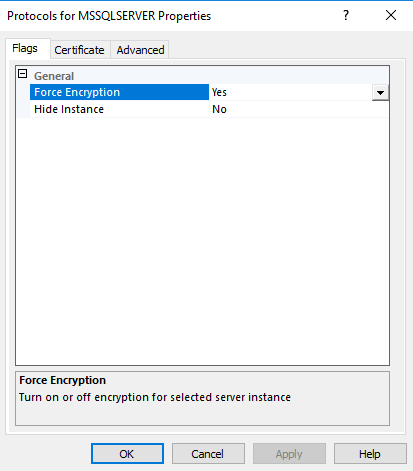
Navigate to “Start -> Microsoft SQL Server 20xx -> SQL Server 20xx Configuration Manager.” Expand "SQL Server Network Configuration". Right click on "Protocols for MSSQLSERVER" and choose Properties. Set "Force Encryption" to "Yes" then click on the Certificate tab where you have to select the certificate you created above.
|
When not using the collector, all clients communicating with the SQL Server will need an up-to-date SQL Server ODBC driver installed in order to support encryption. If a machine is unable to communicate with the database server after you enabled encryption, installing the latest OBCD driver from Microsoft® ODBC Driver 13.1 for SQL Server will usually resolve the problem. |

--------------------OLD_TEXT---------------------
Most ODBC drivers, including Microsoft SQL Server®, transmit network traffic in clear text which can be a problem in security sensitive environments. Microsoft SQL Server® supports protocol encryption which encrypts all traffic between the client (=EventSentry agent) and the Microsoft SQL Server®.
Using protocol encryption requires the following prerequisites:
•Certificate Services installed on machine running SQL Server
•Latest SQL Server ODBC drivers installed on all clients (MDAC)
This chapter will guide you through the process of setting up Certificate Services and requesting a certificate so that SQL server can use protocol encryption. This chapter is based on using Windows Server 2003 for the OS and Microsoft SQL Server® 2000/Microsoft SQL Server® 2005 for the database.
1. Installing Certificate Services
You will only need to follow these steps if you do not have certificate services running in your domain. If you already have a certificate server in your domain then you can skip step 1.
Navigate to "Start -> Settings -> Control Panel -> Add/Remove Programs" and click "Add/Remove Windows Components" which will bring up a screen similar to the one shown below:
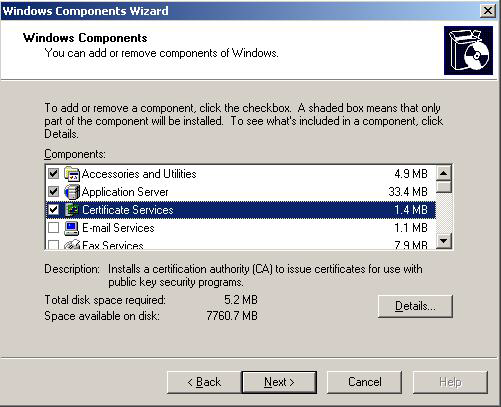
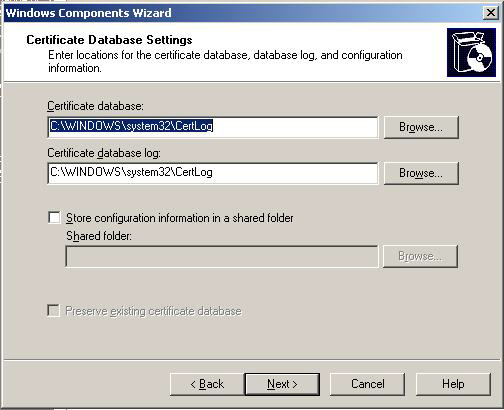
Check "Certificate Services" and click next. Click "Yes" on the confirmation dialog if the imposed restrictions are OK. On the next screen select the appropriate certificate authority type for your network. Please refer to the Windows Server documentation for more information. In our example we will be installing an "Enterprise Root CA" since it is the first CA server:
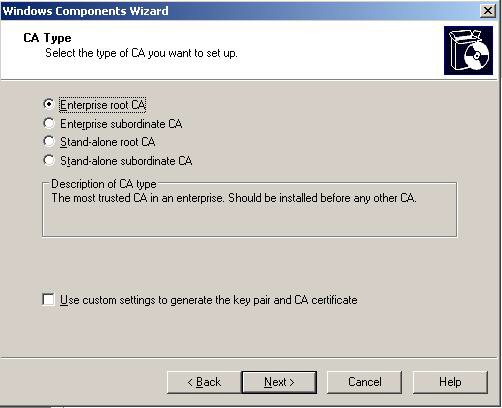
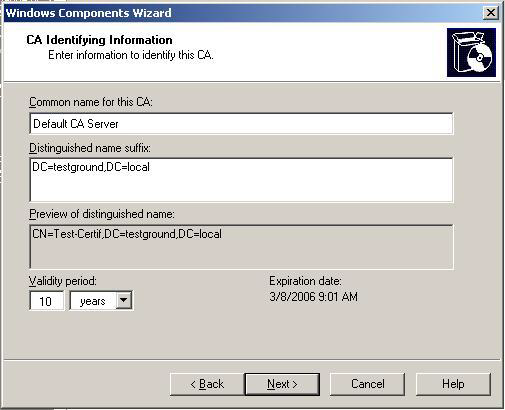
Please note that the following screenshots might look differently depending on the type of CA you select here (the screenshots shown are based on the "Enterprise root CA" selection). On the next screen enter the "CA Identifying Information". Make sure that you enter a good common CA name and a specify a validity period that is long enough:
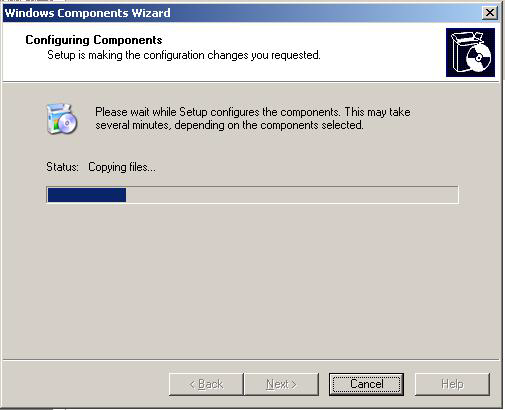
After clicking Next confirm the following dialogs and click "Finish" to complete the setup of the CA.


2. Configuring the MMC snap-in
In order to manage/create certificates you need to configure an MMC for the certificate services. To open the Certificates snap-in, follow these steps:
•To open the MMC console, click Start, and then click Run. In the Run dialog box type: mmc
•On the Console menu, click Add/Remove Snap-in....
•Click Add, and then click Certificates. Click Add again.
•You are prompted to open the snap-in for the current user account, the service account, or for the computer account. Select the Computer Account.
•Select Local computer, and then click Finish.
•Click Close in the Add Standalone Snap-in dialog box.
•Click OK in the Add/Remove Snap-in dialog box. Your installed certificates are located in the Certificates folder in the Personal container.
3. Installing a certificate on the server
In the MMC, click to select the Personal folder in the left-hand pane. Right-click in the right-hand pane, point to All Tasks, and then click Request New Certificate....which will bring up the dialogs shown below:
The Certificate Request Wizard dialog box opens. Click Next. Select Computer as the Certificate type.
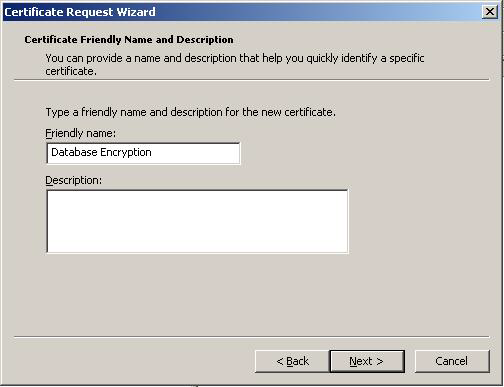
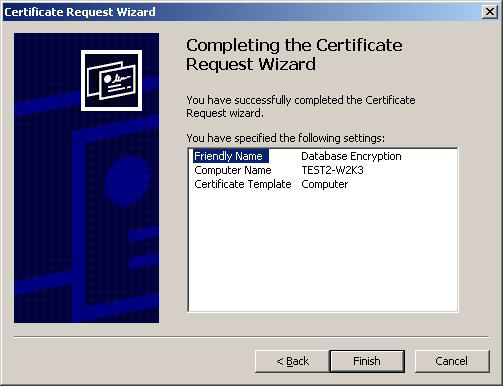
In the Friendly Name text box you can type a friendly name for the certificate or leave the text box blank, and then complete the wizard. After the wizard finishes, you will see the certificate in the folder with the fully qualified computer domain name.
4. Requiring database encryption for all communication
Once the certificate is installed you can configure the SQL Server to "Force protocol encryption".
Navigate to "Start -> Programs -> Microsoft SQL Server 2005-> Configuration Tools" and open the "SQL Server Configuration Manager". Expand "SQL Server 2005 Network Configuration". Right click on "Protocols for MSSQLSERVER" and choose Properties. Set "Force Encryption" to "Yes" then click on the Certificate tab where you have to select the certificate you created above.
|
When not using the collector, all clients communicating with the SQL Server will need an up-to-date SQL Server ODBC driver installed in order to support encryption. If a machine is unable to communicate with the database server after you enabled encryption, installing the latest MDAC (Microsoft Data Access Components) from MDAC Downloads will usually resolve the problem. |
--------------------OLD_TEXT---------------------
Most ODBC drivers, including Microsoft SQL Server®, transmit network traffic in clear text which can be a problem in security sensitive environments. Microsoft SQL Server® supports protocol encryption which encrypts all traffic between the client (=EventSentry agent) and the Microsoft SQL Server®.
Using protocol encryption requires the following prerequisites:
•Certificate Services installed on machine running SQL Server
•Latest SQL Server ODBC drivers installed on all clients (MDAC)
This chapter will guide you through the process of setting up Certificate Services and requesting a certificate so that SQL server can use protocol encryption. This chapter is based on using Windows Server 2003 for the OS and Microsoft SQL Server® 2000/Microsoft SQL Server® 2005 for the database.
1. Installing Certificate Services
You will only need to follow these steps if you do not have certificate services running in your domain. If you already have a certificate server in your domain then you can skip step 1.
Navigate to "Start -> Settings -> Control Panel -> Add/Remove Programs" and click "Add/Remove Windows Components" which will bring up a screen similar to the one shown below:
Check "Certificate Services" and click next. Click "Yes" on the confirmation dialog if the imposed restrictions are OK. On the next screen select the appropriate certificate authority type for your network. Please refer to the Windows Server documentation for more information. In our example we will be installing an "Enterprise Root CA" since it is the first CA server:
Please note that the following screenshots might look differently depending on the type of CA you select here (the screenshots shown are based on the "Enterprise root CA" selection). On the next screen enter the "CA Identifying Information". Make sure that you enter a good common CA name and a specify a validity period that is long enough:
After clicking Next confirm the following dialogs and click "Finish" to complete the setup of the CA.
2. Configuring the MMC snap-in
In order to manage/create certificates you need to configure an MMC for the certificate services. To open the Certificates snap-in, follow these steps:
•To open the MMC console, click Start, and then click Run. In the Run dialog box type: mmc
•On the Console menu, click Add/Remove Snap-in....
•Click Add, and then click Certificates. Click Add again.
•You are prompted to open the snap-in for the current user account, the service account, or for the computer account. Select the Computer Account.
•Select Local computer, and then click Finish.
•Click Close in the Add Standalone Snap-in dialog box.
•Click OK in the Add/Remove Snap-in dialog box. Your installed certificates are located in the Certificates folder in the Personal container.
3. Installing a certificate on the server
In the MMC, click to select the Personal folder in the left-hand pane. Right-click in the right-hand pane, point to All Tasks, and then click Request New Certificate....which will bring up the dialogs shown below:
The Certificate Request Wizard dialog box opens. Click Next. Select Computer as the Certificate type.
In the Friendly Name text box you can type a friendly name for the certificate or leave the text box blank, and then complete the wizard. After the wizard finishes, you will see the certificate in the folder with the fully qualified computer domain name.
4. Requiring database encryption for all communication
Once the certificate is installed you can configure the SQL Server to "Force protocol encryption".
Navigate to "Start -> Programs -> Microsoft SQL Server 2005-> Configuration Tools" and open the "SQL Server Configuration Manager". Expand "SQL Server 2005 Network Configuration". Right click on "Protocols for MSSQLSERVER" and choose Properties. Set "Force Encryption" to "Yes" then click on the Certificate tab where you have to select the certificate you created above.
|
When not using the collector, all clients communicating with the SQL Server will need an up-to-date SQL Server ODBC driver installed in order to support encryption. If a machine is unable to communicate with the database server after you enabled encryption, installing the latest MDAC (Microsoft Data Access Components) from MDAC Downloads will usually resolve the problem. |