When you start EventSentry for the first time then you will see the licensing dialog as shown in the dialog below. The Trial Version Information area shows how many days are left for evaluation (or indicates that you are running the full version) and you can enter a new or update an existing license with the Manage Licenses button.
|
Important information about licenses
1.You can only install a maximum of one trial license. 2.All installed licenses must have the same organization name. 3.All installed licenses must have the same version number (see below) 4.You will need to have at least one regular (agent) license installed, EventSentry will not work if you only have network device licenses or NetFlow licenses installed. |

Version Numbers and Expiration
All licenses are perpetual and will never expire, but will only work with versions of EventSentry which were released before the expiration date of the installed licenses.
|
Example You cannot install a version of EventSentry which was released on May 1st 2019, if the installed licenses expire on April 1st 2019. You are however eligible to install any version of EventSentry which was released on or prior to April 1st 2019. |

The expiration date of a license reflects the end of the maintenance agreement. Renewing the annual maintenance and thus extending the maintenance expiration date will result in new license keys being generated and sent to the user. These license keys can easily be imported into the management console.
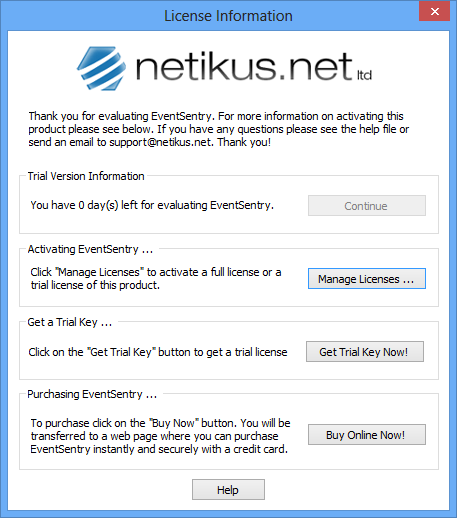
License dialog without installed license
Managing Licenses
After clicking the Manage Licenses button you will be presented with the License Management dialog:
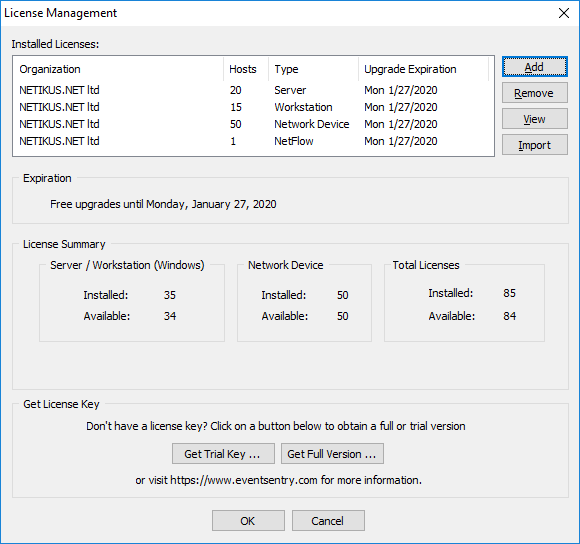
The license management dialog lists all installed licenses (up to 25 licenses are supported) and shows the total number of installed licenses, including how many licenses are still available (Total Available Licenses).
To add a new license, click the Add button. To remove a license, click the Remove button. You can view an already installed license by clicking the View button.
Adding Licenses
Licenses can either be added individually with the Add button, or imported in bulk from a file with the Import button (recommended).
Importing licenses
When a license file is available, importing the entire file with all license keys contained within the file is the easiest way to add licenses. License files are sent from the NETIKUS.NET Online Store whenever a maintenance agreement is renewed or when new licenses are purchased. Importing licenses will replace all existing licenses with the licenses from the license file.
Adding a license
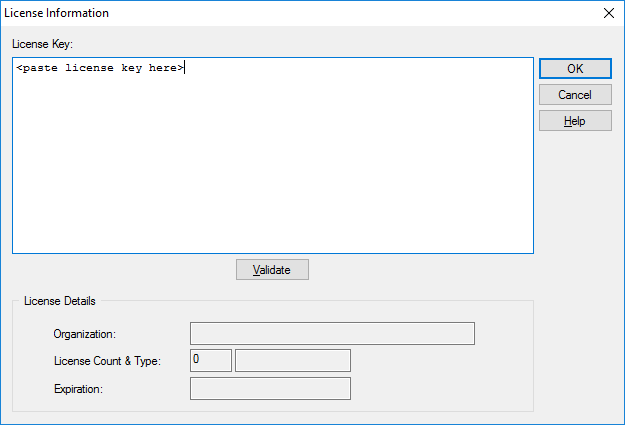
To add an individual license, click the Add button and paste the license key into the License Information dialog shown below.
|
Paste the entire license key exactly as it appears in the email or the license file. If the key is valid then it should automatically validate and fill in the license details on the bottom. Clicking the Validate button will manually attempt to validate the license key. |
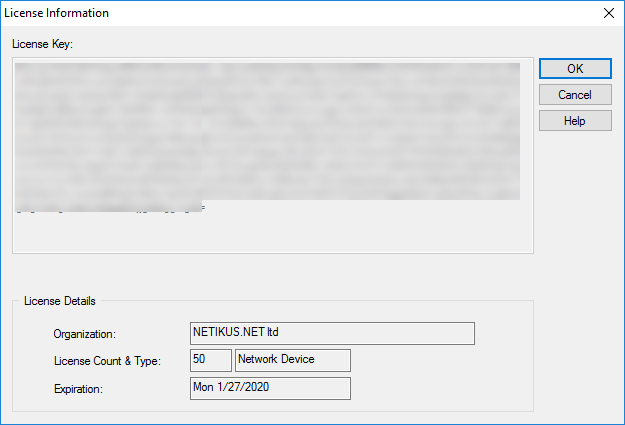
A validated license key will show similar to the dialog shown below: