Integrating the EventSentry tray app "EventSentray" with Zendesk
Zendesk is a popular customer service ticket system. Starting with version 4.2, EventSentry supports the tray icon feature that allows administrators to integrate different IT helpdesk ticket systems so the user can easily open support tickets right from their workstation through a convenient tray icon. This guide illustrates how to integrate EventSentry with Zendesk Help Desk via an email action.
Steps:
- Zendesk Admin Configuration
- Create and Configure a Zendesk HTTP action
- Assigning Action to the Tray Application
- Saving Configuration & Client Example
Zendesk Admin Configuration
From the Zendesk Administration website, click on configuration (1), Then Customers (2), Then make sure that the option "Anybody can submit tickets" is enabled. This option comes enabled by default. Also, to add extra security, you can add domains and email addresses to the white or blacklist.

Zendesk Admin Configuration
Create and Configure a Zendesk HTTP action
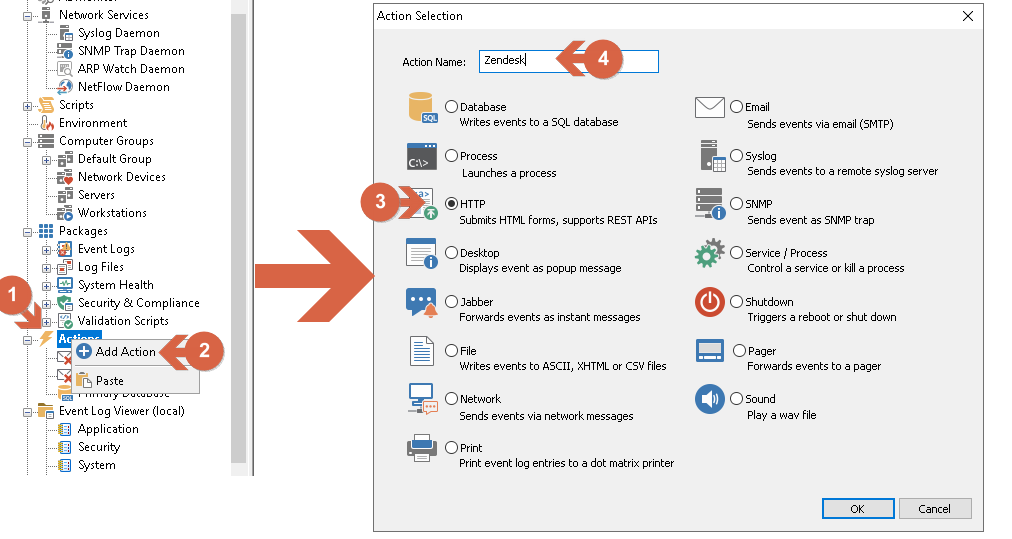
From the tree or ribbon, (1) (right-)click on Actions and select (2) Add Action. In the Action Selection window, (3) select HTTP, (4) choose an action name, "Zendesk" in this example, and click OK.
Creating Zendesk HTTP action
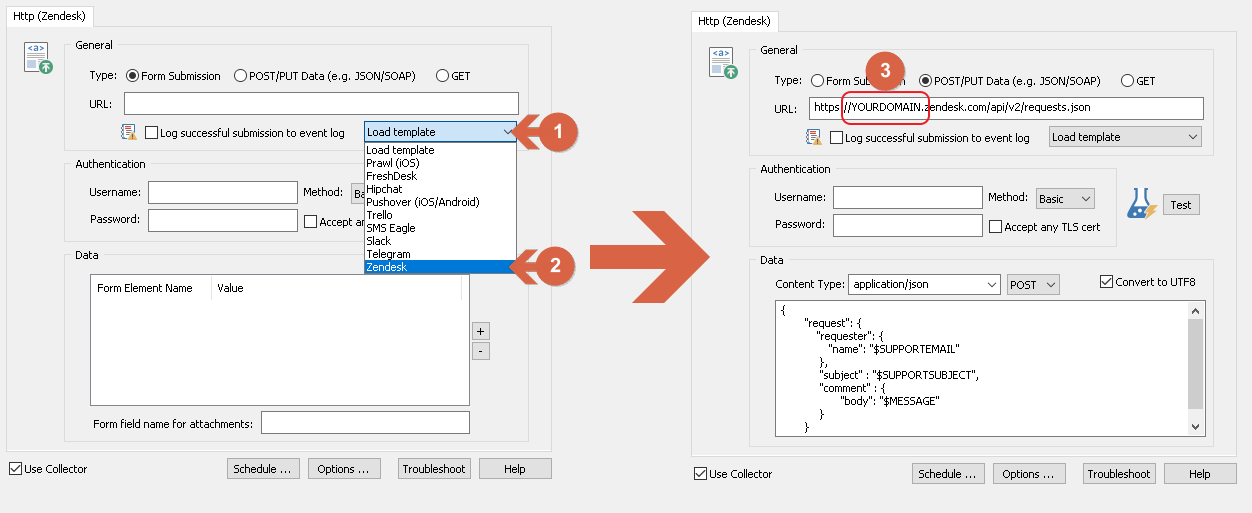
After creating the HTTP action, the configuration window will appear. (1) Click on the drop-down menu "Load Template" and (2) select Zendesk to load the preset configuration. (3) Replace the subdomain in the URL so that it matches your company's subdomain.
Configuring Zendesk HTTP action
Assigning Action to Tray Application
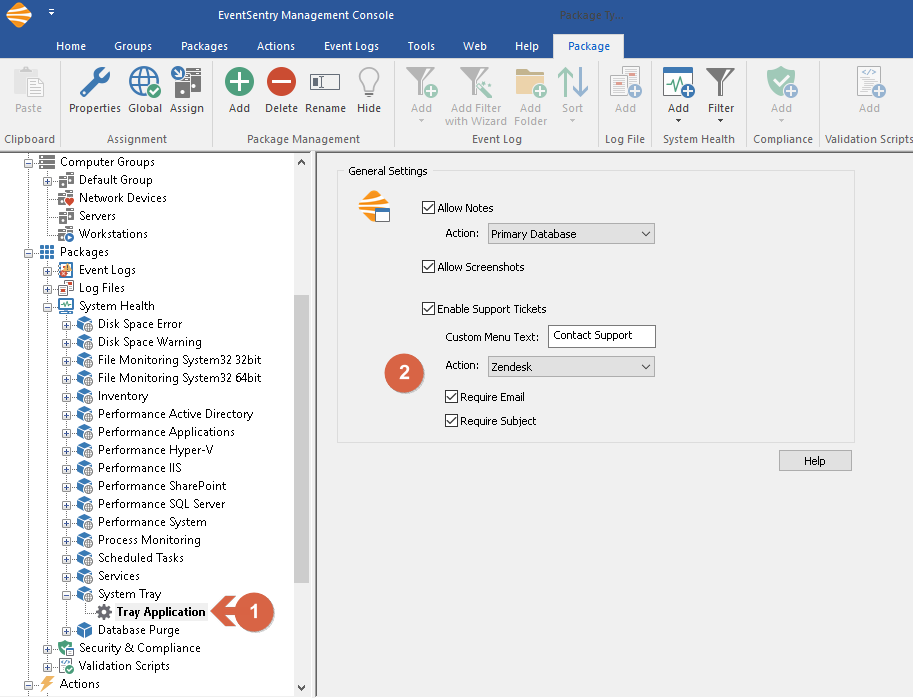
After the action has been created, you must assign the action to the System Tray package. To do so, (1) under Packages / System Health / System Tray, click on Tray Application. (2) From General Settings, activate Enable Support Tickets and specify a suitable link description for your end-users, e.g., IT Support, and then select the just created action (Zendesk). Enable both the Require Email and Require Subject options.
Assigning Action to Tray Application
Saving Configuration & Client Example
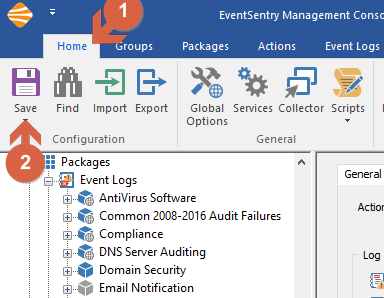
From the top menu, (1) click Home (2) and either click the "Save" or "Save & Deploy" icon. It may be necessary to manually push the configuration if the collector is not being used. Clients will pick up the new configuration, and in a couple of minutes, the tray icon option should show up on all monitored hosts with a tray icon.
Save Configuration

Right click on tray icon