How do I install and configure the HWg-STE Ethernet temperature / humidity sensor?
This guide explains how to deploy the HWg-STE Ethernet temperature / humidity sensor in your server room or office.
Note: Please see the links below if you have not yet purchased the HWg-STE.
Steps:
- Unboxing and connecting the sensors
- Connecting to the HWg-STE and configuring it
- Adding the sensor to EventSentry
Unboxing and connecting the sensors
Inside the box you can find the actual device including the PSU, the installation CD, temperature sensor and, if purchased, the optional humidity sensor. You can also add more temperature sensors to it.
Connect the sensor as shown in the picture below:
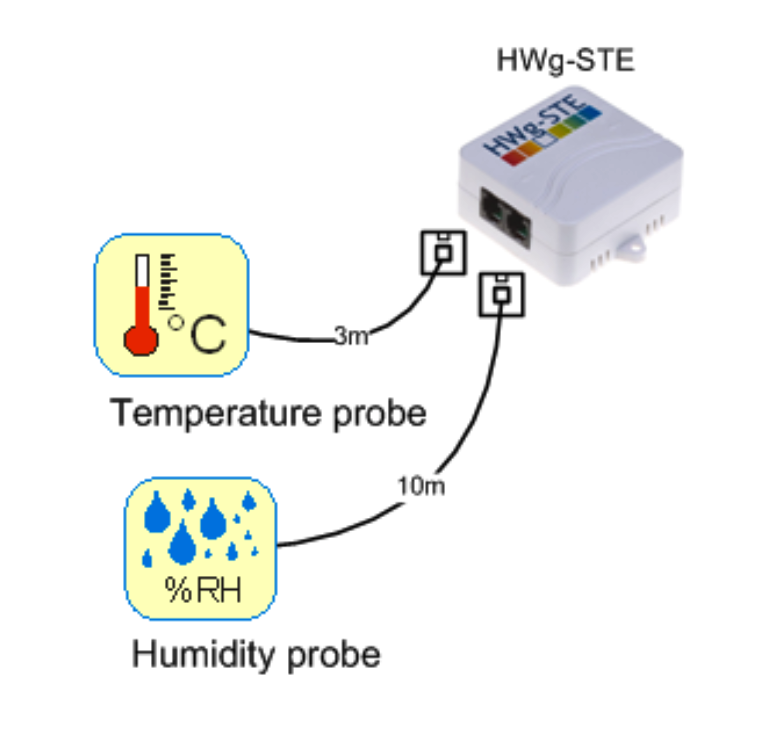
HWg-STE Connections.
Connect the device to power and then connect the ethernet cable to the network and the device.
Connecting to the HWg-STE and configuring it.
By default the device will obtain its IP address from DHCP; if you have access to the DHCP server leases then you can find the IP address there. The default hostname of the device is HWG-STE, and the vendor mac address starts with 00:0A:59. If you don't have access to the DHCP leases then you can use an app called UDP Config on the supplied CD (or download it from the vendor site here). Once you find the IP address, simply enter it in a web browser to access the configuration panel.
To set a static IP address, go to the General Setup, alternatively you can also manage the lease reservation on your DHCP server. It is highly recommended to set a user and password for admin access to the device which can be configured under Security: Device Admin
After setting the IP address securing the admin access, SNMP can be configured on the device. From the SNMP option on the top menu (1) you will find a window containing the basic SNMP configuration.
Enter a desired System Name (2), System Location (3), and contact information if necessary. Make sure that the snmp port is still configured to use the default port (161) and, most importantly, set a secure community name (4). Make sure that the community has read and enable checks.
Save the configuration and wait until the device restarts. The device should now be fully configured.
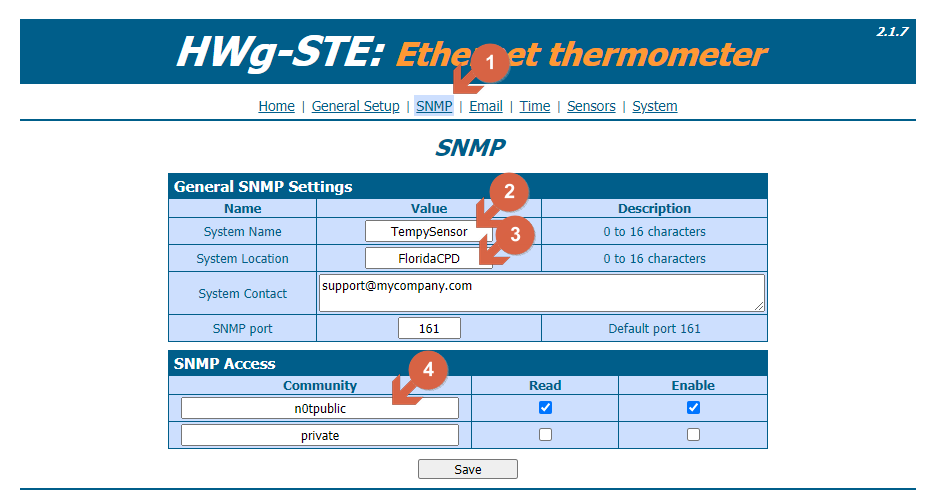
SNMP Configuration Window
Adding it to EventSentry
Adding the device to EvenSentry
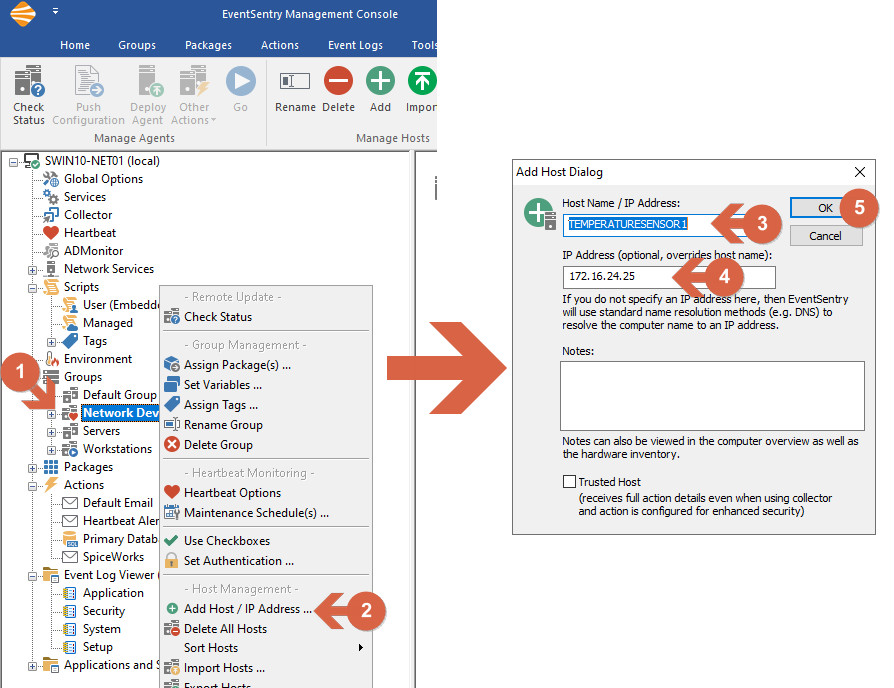
From the configuration tree in the EventSentry GUI, right-click on Network Devices under Groups (1) and select Add Host / IP Address (2). In the Add Host dialog enter the desired alias (or host name) (3), the ip address (4) and click OK (5).
Adding Host
Importing System Health Package
The next step is to add the System Health package that is not loaded by default. In the configuration tree right click over Packages (1) and click download updates (2). Save the configuration when asked, then click Start Download and then Continue. In the package repository window under System Health Packages group (3) look for the package called HWg-STE Sensors and select it (4) and click on Import Now. This will automatically add a new package inside System Health with the same name.
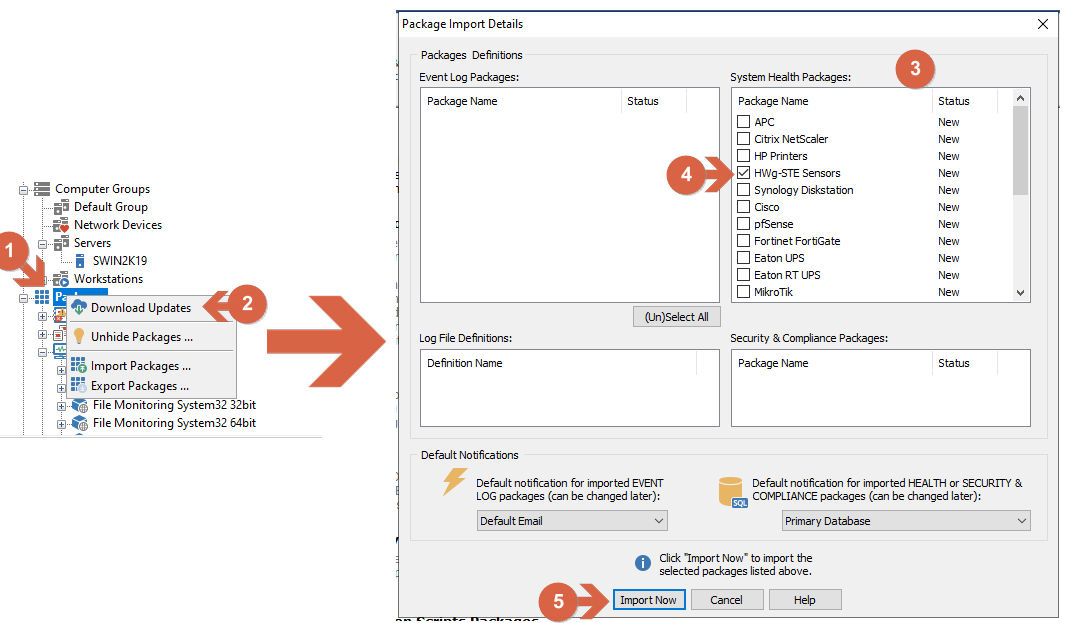
Importing Package
After the package is imported it needs to be assigned to the device. Simply right-click the package HWg-STE Sensors (1) and click on Assign (2), and in the next windows select the device we just added (3) and click OK (4).
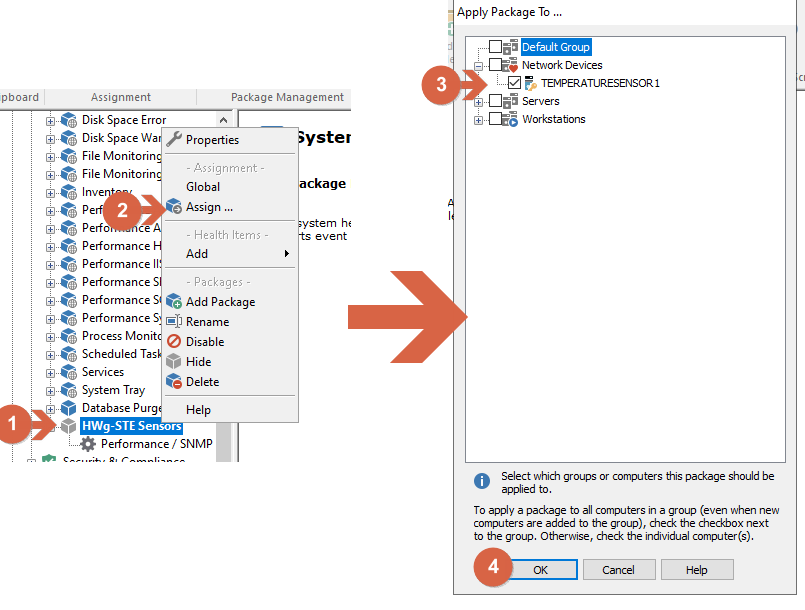
Assigning Package
Configuring the (optional) humidity sensor
The humidity sensor cable must be purchased separately, and configured in EventSentry.
To do add it, left click on Performance / SNMP Package inside HWg-STE Sensors (1) and click the + button (2). We called the sensor "Humidity" (3), the interval can be modified as needed, we used 30 seconds for this example (4), finally specify '1.3.6.1.4.1.21796.4.1.3.1.5.2/10' as the SNMP OID. (5). After adding this you should start receiving data from the device in a minute (6). Click OK (7)
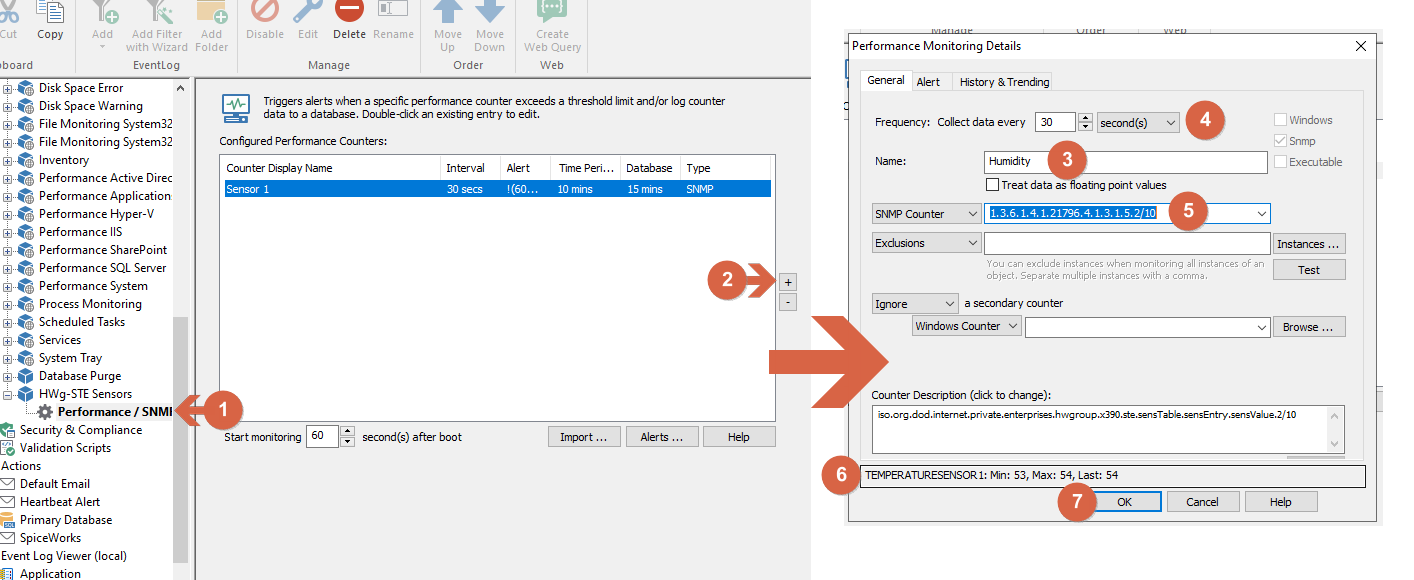
Adding Humidity Sensor support
Saving configuration and seeing results in the web reports
From the top menu, (1) click Home (2) and click the "Save" icon.
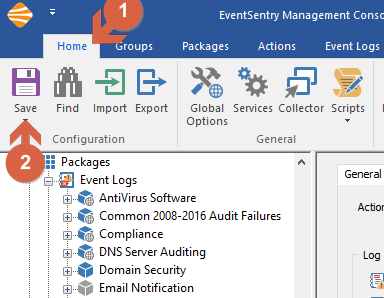
Save Configuration
In the web reports we can see the sensor data by navigating to Dashboards and Host Inventory. Click on change near the first host and from the list select the device that we just added. You can see the sensor readings on the Performance tab.
.png)
Sensors Reading