How can I list files that weren't modified in the last X days?
Utilizing a PowerShell script that outputs files not accessed or modified in a certain number days, EventSentry can then import the structured output from a temporary text files and facilitate on-demand searching as well as reports and jobs.
- Create an embedded script
- Schedule the script to run periodically with the Application Scheduler
- Create a log definition, log file and add them to a Log File package
- Review the data
Create an embedded script
To create an embedded script, (1) in the left tree under "Scripts" click "User (embedded)" then (2) click "Add" button in the ribbon. (3) Enter the desired script name ending with .ps1 (since this will be a powershell script, for this example noaccfiles.ps1 is used), (4) Write a description and (5) paste the script content. In EventSentry v4.1 and earlier, embedded scripts are managed via Tools -> Embedded Scripts. The contents of the script are below:
1 2 3 4 5 6 7 8 9 10 11 12 13 14 15 16 17 18 19 20 |
#Specify Number of days
$numDays = '10'
$strMonPath = "C:\Temp"
$strLogPath = "C:\Logs"

Function Get-NeglectedFiles
{
 Param([string[]]$path,
       [int]$numberDays)
 $cutOffDate = (Get-Date).AddDays(-$numberDays)
 Get-ChildItem -Path $path |
 Where-Object {$_.LastWriteTime -le $cutOffDate}
}

If(!(test-path $strLogPath))
{
      New-Item -ItemType Directory -Force -Path $strLogPath
}

Get-NeglectedFiles -path $strMonPath -numberDays $numDays | select name, lastwritetime  | Export-Csv -Path $strLogPath\NotModifiedFiles.csv -NoTypeInformation
|
You can adjust the $numDays variable to the number of days that are considered too old/inactive for a modified file. In the script above, it will look for files that have not been modified in 10 or more days.
You can change the $strMonPath value according to the folder that you want to scan for inactive files. In the script above, it will scan the C:\Temp folder.

Creating an embedded script
Schedule the script to run periodically with the Application Scheduler
In the left tree, under "Packages", right click "System Health" and then choose "Add Package". In this example we called the package "Files Not Modified". Right click on the new package and choose "Add" and then select "Application Scheduler". Click the new "Application Scheduler" object that appears below the package name, and then on the right side of the console, inside the "Schedule" section, click the "+" (Add) button, and then select the schedule you'd like to use (e.g. every 4 hours). In the Filename drop-down select the new embedded script that you just made (for this example noaccfiles.ps1 was used).
Assign the package: Right click the new package ("Files Not Modified" for this example) and choose Assign. Select the group(s) or computer(s) where this script should run.
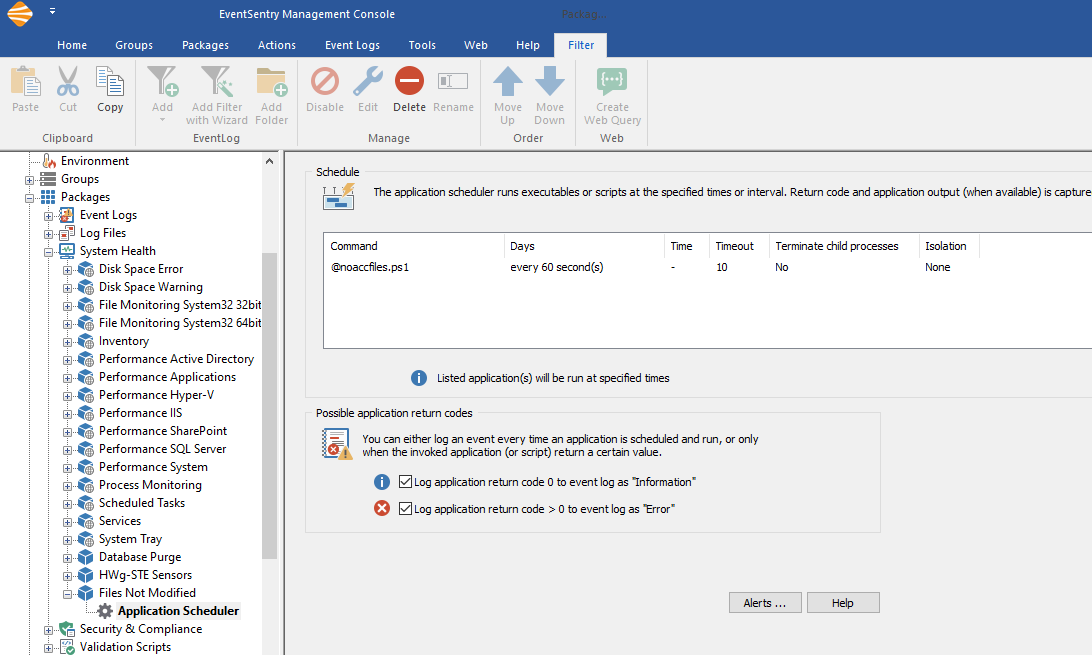
Created Application Scheduler package
Create a log definition, log file and assign it
After the embedded script is created and an application scheduler for the script is in place, the last step is to create and assign a log definition to pick up the script results and send them to the database in order to have them available at the Web Reports.
From the left configuration tree, under "Packages" right-click on "Log Files" and choose "Add Package": "Not Modified Files" is used as the package name for this example. Right click on the new package and choose "Add File". Click the "Create New" button at the bottom of the file list. In the "Log File Definitions" section at the bottom of the screen, click the "+" (add) button on the right to add a new log file definition.
In the Log File Definition menu (1) First click the "Clear" button (2) and enter a definition name (AccFile is used for this example) (3) Make sure that the field delimiter is "," (comma). (4) For the first field, enter "File Name" as the field name and choose "Lookup Text (1024 max) in the field type drop-down. (5) For the second field enter "Last Used" as the field name and choose "Date/Time" in the field type drop-down. (6) Click OK to save the log file definition.
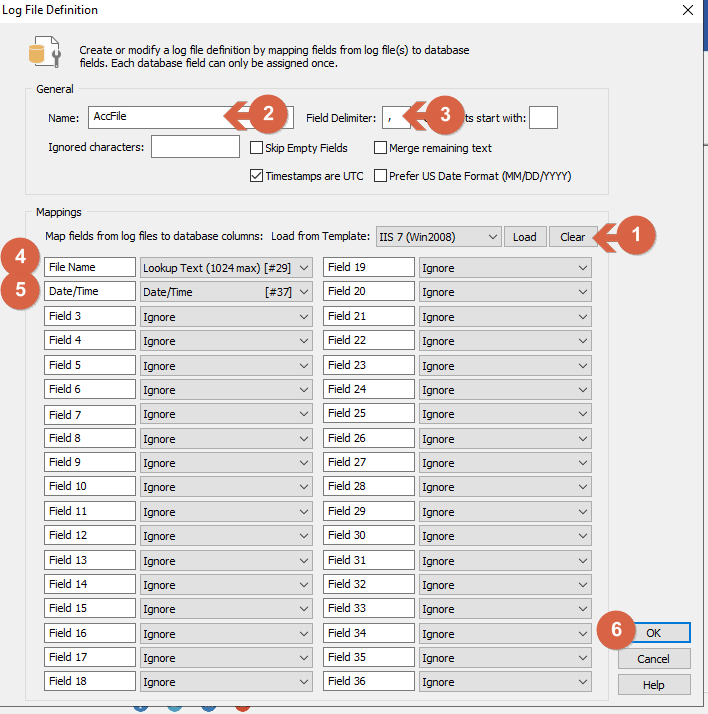
Adding Log File Definition
In the "Log Files" section at the top of the screen, click the "+" (Add) button on the right to open the "Add / Edit File to Monitor" window. (1) Enter the nickname for the log file (LogAccFile for this example). (2) Un-check the "Non-Delimited" checkbox (3) Select the new log file definition (AccFile in this example) from the list (4) Enter the path of the log file. By default the script will save the results as "C:\Logs\NotAccFiles.csv" so that is the value that is used in this example (5) Click OK to save the log file type settings.

Adding Log File
From the left configuration tree, under "Packages" and then under "Log Files" right-click on the new package ("Not Modified Files" in this example) and then choose "Add File". (1) Now the log file list should contain an entry for the log file type that was just created (LogAccFile in this example) and (2) Click OK to monitor this log file.
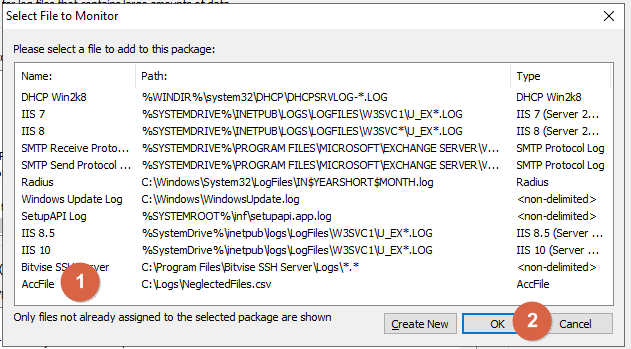
Adding Log File
Now the log file monitoring settings will appear. On the "Database Consolidation" tab (1) In the Database section at the top click the "Add" button, (2) Select the desired database action. If only one database action is present it will be automatically added.
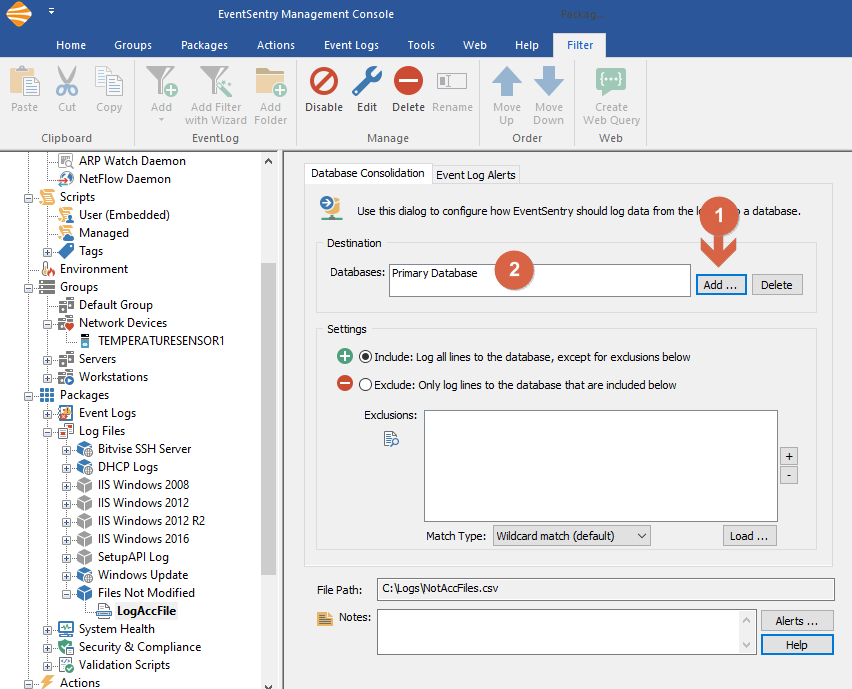
Configuring Log Package
The last step is to assign the package to the computer(s). To do so, right click on the Log File package ("Not Modified Files" in this example) and choose "Assign", and enable the checkboxes for the group or computer(s) or group(s) that you previously chose for assigning the scheduled script.
Review the data
From the toolbar, (1) Click the Home tab (2) and click the "Save" button.
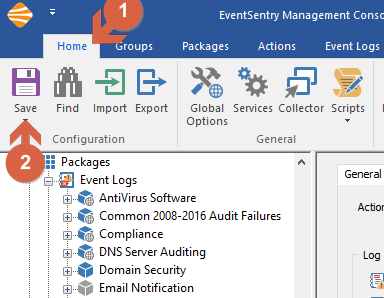
Save Configuration
After the script's scheduled run time has ended, the data can be seen by navigating to "Search" -> "Log Files" -> "Delimited Log File". Under the "Detailed" tab it will list all files that weren't modified during the time specified in the script.

Files list in the Web Reports
But wait, there's more!
The same script and the same steps can also be used to scan for files that have not been accessed (read/opened) within a certain number of days. Unfortunately, not all programs update the Last Accessed date when a file is read or opened, so the results may not be 100% accurate. To modify the script to use the last access time instead, use CTRL+H (Find and Replace) in the script and find:
LastWriteTime
and replace it with
LastAccessTime
Choose "Replace All" and you're all set to scan for file access rather than file modification. Some of the example package names chosen earlier might not make as much sense in this new context and should be updated.