Sending an email reminder when users have been logged into a server for a certain amount of time
EventSentry has the ability to email a user or users when they have been logged into a server for a set time limit. For example, a server or group of servers, have an RDP connection limit, and users should be reminded to log off when they are done. EventSentry can send email reminders to those users when they have been logged in for a certain amount of time without logging off.
1. Creating the package
In the management console, open the tree to Packages > Event Logs, right click "Event Logs" and add a new package. Name the package anything you would like, but a descriptive name like “Stale Logon” will make it easier to identify later.
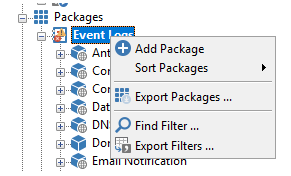
The package needs two filters to work, a timer filter and a "clearing" filter. Right click the package and add the first filter. This filter will track a user’s logon and contain the timer, so the example will be named Logon Timer Filter but it can of course be named anything descriptive.
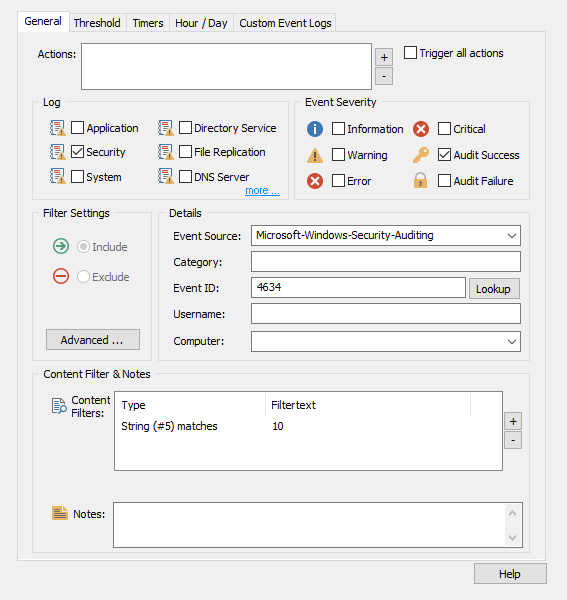
Set up the first filter with the settings in the screenshot below. To set a content filter based on an insertion string, click the plus button next to the content filters panel and in the Text Match Type dropdown select "Insertion String Match."
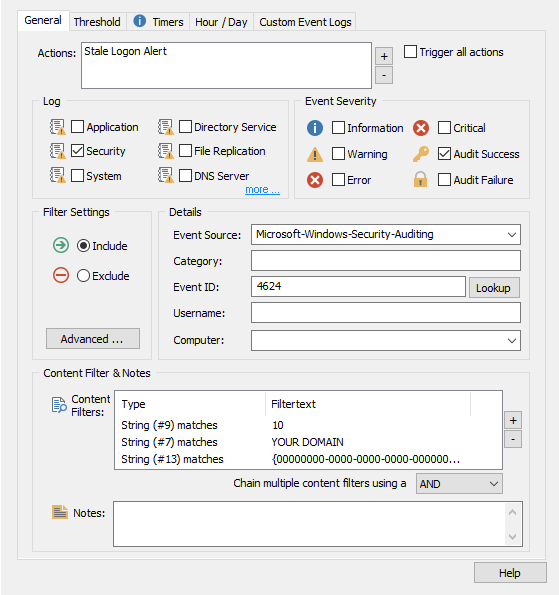
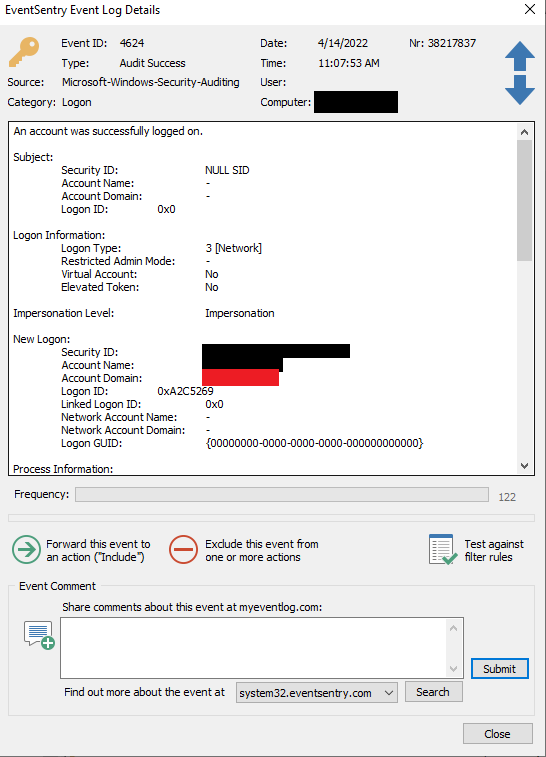
Note that in the content filters, string #7 will be your domain name. Telling EventSentry to only apply this filter to your domain will prevent system accounts from triggering your filter. Make sure the domain name matches exactly what is in the "Account Domain" line of your 4624 event. You can check how your domain appears in 4624 events in the management console under "Event Log Viewer (Local)." Open the "Security" Logs and filter to 4624 events. Find a logon event of a user, and make sure the domain name in your content filter matches the line highlighted red in our screenshot below.
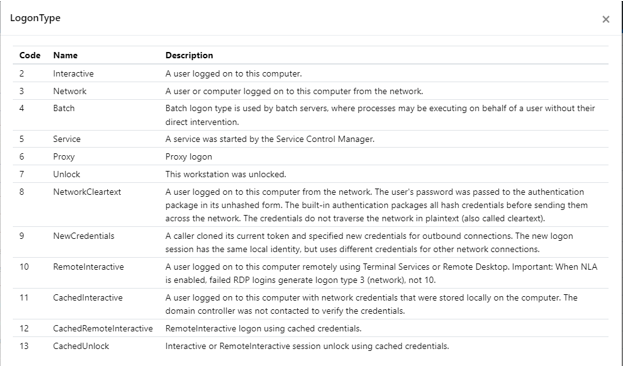
String #9 will change based on the user's logon type, logon type 10 in this example. RDP logons generate logon type 10, unless NLA is enabled in which case they generate type 3. Other common logon types are type 2 "Interactive," which include standard keyboard and mouse logons, and type 11 "Cached Interactive," when a user logs on from a keyboard with cached credentials and a Domain Controller is not contacted. You can see all logon Types below and from our System32 site: https://system32.eventsentry.com/security/event/4624
Lastly, setting a filter for string #13 with a value of {00000000-0000-0000-0000-000000000000} will prevent users from receiving multiple emails. Part 2 of this article will discuss how to create a "Stale Login Alert" in the "Actions" pane.
Next, right click the package and create a second filter. This filter will track the logoff event and be the “clearing” filter; if the user logs off in the time limit you set then it will “clear” the first filter and the email alert won’t send. Set up this filter with the settings below, matching the string #5 content filter to the logon type you set in the first filter.
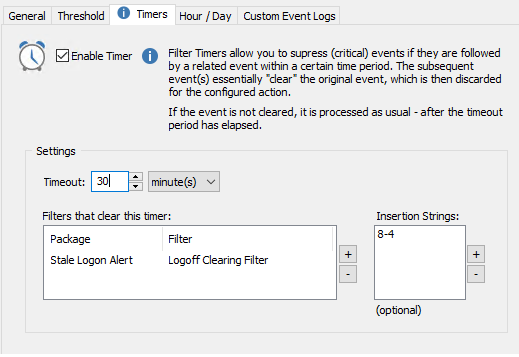
Finally, return to the first filter and set your timer. Click the "Timers" tab, and enable the timer. Set the timeout for however long you want, and click the plus sign next to the “Filters that clear this timer” panel to add the second filter we just created. Lastly, set the insertion strings to match the Logon and Logoff events. This will ensure that the logon timer isn’t cleared by an unrelated logoff event, such as a different user logging off an RDP session. Click the plus sign next to the panel and set the timer filter to string 8 and the clearing filter to string 4. These strings correspond to the logon ID of each event.
2. Creating the email action
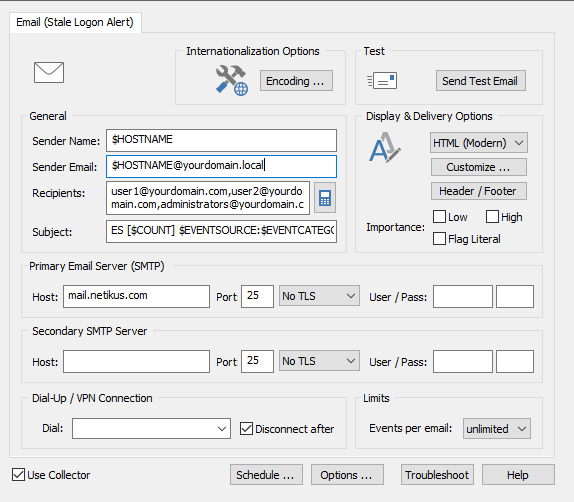
The package can be set to any email action, including the "Default Email" action. However, creating a dedicated email action can allow the package to alert any email address you choose, and in some cases only the specific user logged in past the timer limit. In the management console tree, right click "Actions" and add an action. Create a new email action, and name it something you will recognize is dedicated for this package. In the email settings, there are a few options for your "recipients" line.
One option is to set it to a certain address, or a number of addresses each separated by a comma. Or, if your domain is set that a user’s username is the same as their email (eg. The user name1 has the email name1@yourdomain.com) then you can set the email action to email ONLY the user that is logged in using insertion strings.
Username does not match email address
If your environment's usernames don't match user's email addresses, or if you only want send your alert to certain addresses, simply type the addresses into the recipients line each separated by a comma.
Username matches email address
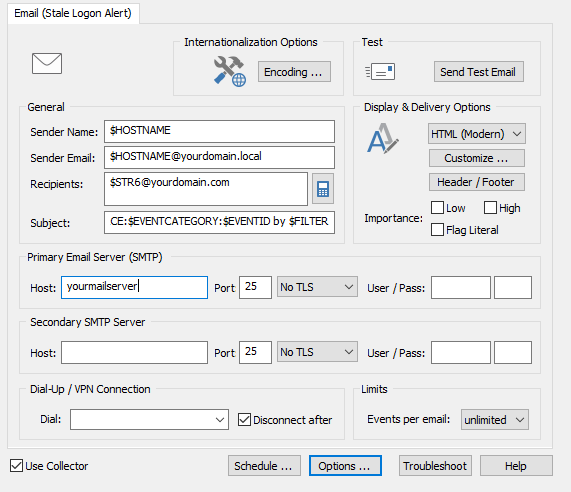
If usernames in your environment match the user's email address exactly, it's possible to send the alert to only the user that is logged in. In the recipients line type $STR6@yourdomain.com. EventSentry will replace $STR6 with the insertion string 6 from the 4624 event. String 6 is the user’s username so this will end up only emailing the user logged in, making sure only they get the message and other users aren’t spammed.
3. Finishing Touches
Return to the timer filter, and add the email alert you just created to the Actions pane. By default EventSentry will email the full 4624 event to the user, but EventSentry can override this with your own custom email to make it more readable. Under "Filter Settings," click "Advanced..." and under "Email/Network Action Override" you can set your own email subject and message. You can even use variables to personalize your message. For example, $STR6 will again be replaced with the user’s username and $HOSTNAME will be replaced with the PC they are logged into. Click "Ok," then right click your package and click "Assign..." to assign it to the servers you would like it apply to. Once you save your configuration then the package will take effect.
