Monitoring file checksum changes on Linux hosts
File integrity on Linux hosts can be monitored by integrating the Samhain tool and EventSentry.
Note: This guide was created with Debian/Ubuntu in mind, the process should be similar for other distributions with a slightly different command line.
- Configure Syslog on Linux and verify that Syslogs are sent to EventSentry
- Download / Unzip the Samhain File Integrity Monitoring Tool
- Samhain Installation
- Samhain Configuration and Initialization
- Final Notes
- Add Monitoring Dashboard to Web Reports
Configure Syslog on Linux and verify that Syslogs are sent to EventSentry
The First step is to configure the Linux Host to send to Syslog logs to EventSentry. By default, most distros come with syslog installed by default, but if that is not the case then rsyslog must be installed. To check whether rsyslog is installed:
dpkg -s rsyslog
If it is NOT installed then install it as follows:
sudo apt update sudo apt install rsyslog -y sudo systemctl enable --now rsyslog
Once rsyslog is installed, open the configuration file using the desired text editor:
sudo pico /etc/rsyslog.conf
and add the following line (replacing Eventsentry_IP with the EventSentry machine name or IP address):
*.* @@[Eventsentry_IP]:514
Note: by default rsyslog will connect using TCP. Be sure to check EventSentry GUI for the correct port for TCP connection under Network Services / Syslog Daemon.
Save the file, exit the text editor and restart the rsyslog service for the changes to become effective:
sudo service rsyslog restart
To verify that Syslog messages are arriving send a test message by running:
echo "<14>Test TCP syslog message" >> /dev/tcp/[EventSentry_IP]/514
The message should show in the WebReports under Features/Syslog.
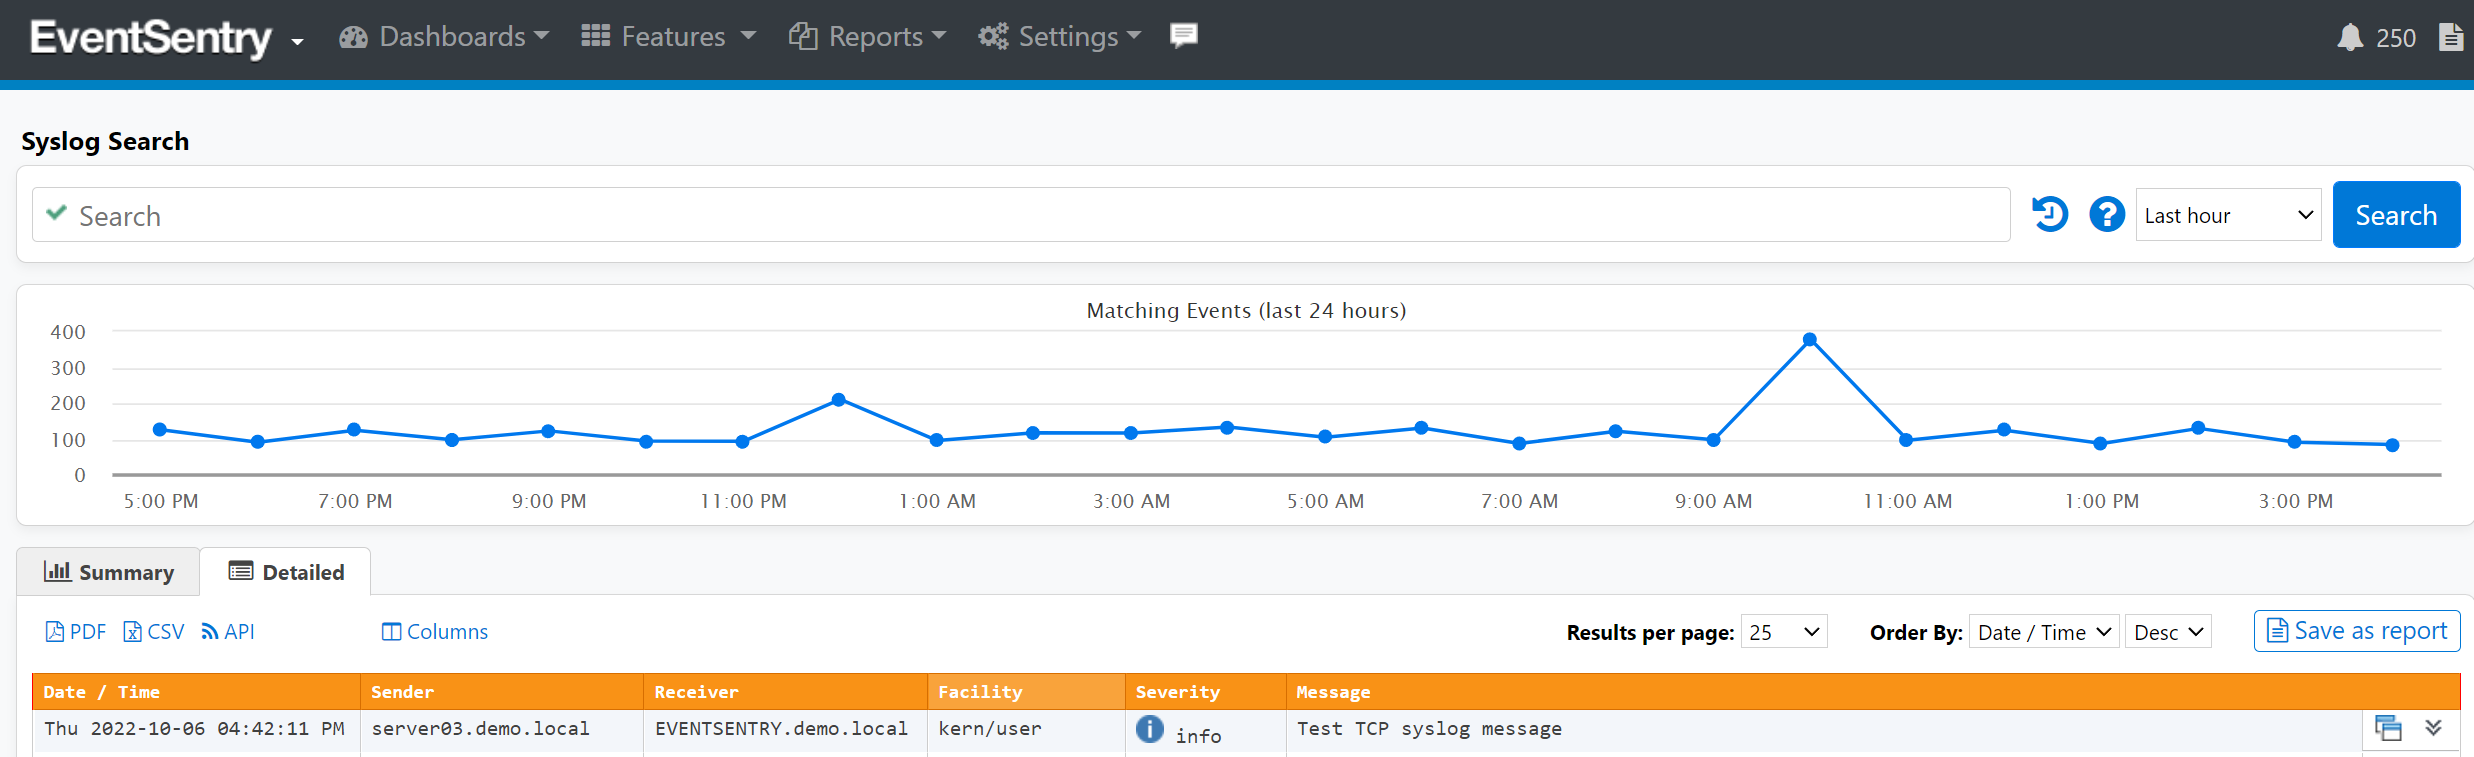
Syslog message received in EventSentry
Download / Unzip the Samhain File Integrity Monitoring Tool
The latest version of Samhain is available here. The file can be downloaded and then uploaded to the Linux Host, or downloaded using the wget tool:
wget https://www.la-samhna.de/samhain/samhain-current.tar.gz
Unzip the file:
gunzip samhain-current.tar.gz tar -xf samhain-current.tar
(Optional): Check the signature of the file:
gpg --keyserver pgp.mit.edu --recv-key 0F571F6C gpg --fingerprint 0F571F6C gpg --verify samhain-4.4.9.tar.gz.asc samhain-4.4.9.tar.gz
Note: The samhain- file name will change to the current version name
Unzip second layer of the file:
gunzip samhain-4.4.9.tar.gz tar -xf samhain-4.4.9.tar cd samhain-4.4.9
Note: The samhain- file name will change to the current version name
Samhain Installation
A C compiler is required to install Samhain, otherwise the configure and make commands won't succeed. Run the following command to install gcc:
sudo apt install gcc make
From the Samhain folder run:
sudo ./configure sudo make sudo make install
Note: *During the "make install" process you may see an error about a non-trusted user, which refers to the Syslog user accessing the samhain log folder. If that is the case, then the "configure" process must be ran again, adding the user id to the trust list by running (replace UID with the UID printed in the error, the error will output "trustfile: checking group member syslog, uid 104" that 104 will be the UID)
sudo ./configure --with-trusted=0,UID
Then, run the make and make install commands again.
If running Samhain as a daemon is desired (recommended), then run the following command after make install:
sudo make install-boot
Samhain Configuration and Initialization
Before Samhain is initialized, a few parameters must be added to the config file. Open the /etc/samhainrc configuration file with a text editor, for example:
sudo pico /etc/samhainrc
and add the following lines:
This will configure Samhain to log to Syslog, set the default severity to Warning, report the file change once (until it changes again) and send a full report. Save the file and exit the text editor.
Now we are ready to do the first initial checkpoint for Samhain:
sudo samhain -t init
Note: It is important to understand that the INIT command must be run only one time. After the initialisation, the checkpoint update command must be used and not INIT. Running INIT multiple times will break the checksum database and cause errors in Samhain.
sudo samhain -t update
After all changes are saved, the Samhain daemon must be restarted (or started if it is not running as daemon) by running:
sudo samhain stop sudo samhain start
apt update / apt upgrade can be run to generate some file changes for testing. File changes should be showing up in the EventSentry WebReports under Features/Syslog

EventSentry Syslog example file change message
A live Samhain to syslog message list can be found here
For monitoring specific files in your Linux Host, please refer to the Samhain documentation. For example, if a particular log file is desired to be monitored, the GrowingLogFiles method can be used. So the folder or file to be monitored can be added under that section inside the Samhain configuration file (/etc/samhainrc)
[GrowingLogFiles]

dir = 99/var/myapplog
Add Monitoring Dashboard to Web Reports
Attached to this article is a pre-made dashboard with regex filtering displaying file changes.
The dashboard file should be copied to the "\web\webapps\ROOT\WEB-INF\application\conf\" folder in the root of the WebReports install folder, by default:
C:\Program Files\EventSentry\WebReports\web\webapps\ROOT\WEB-INF\application\conf\ Restarting the service is NOT needed.
The option to Import the Linux File Monitoring dashboard will be available under Dashboard Mananger (spacebar) -> Import.
A live demo of this dashboard can be found here.
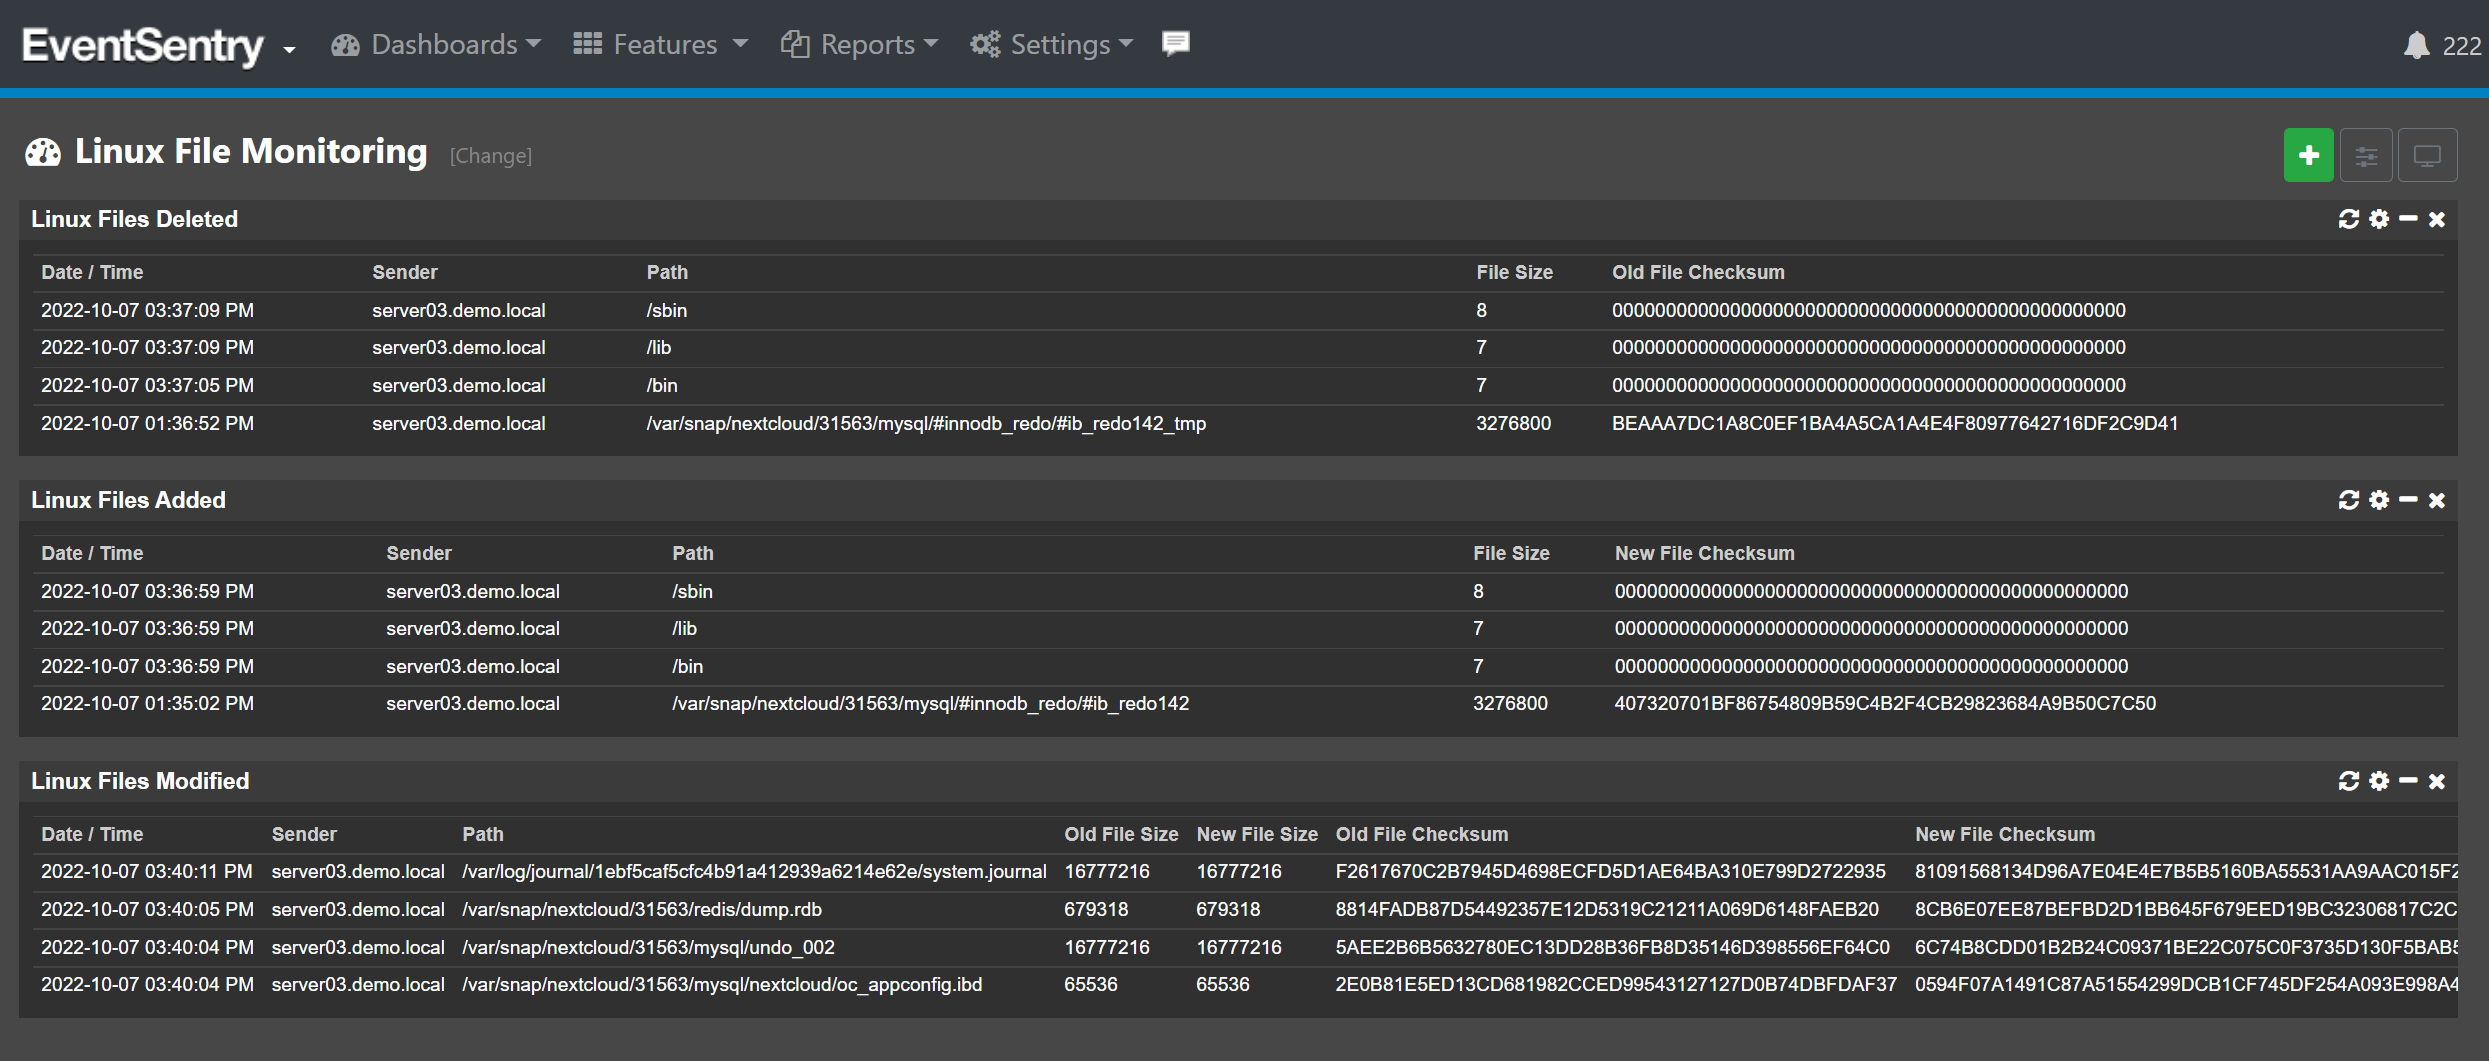
EventSentry Linux File Monitor Dashboard