How can I install Heartbeat agent on different computer/machine?
How can I install the Heartbeat agent on a separate computer/machine?
EventSentry's Heartbeat agent can be installed on a different computer/machine separate from the rest of your EventSentry installation. You can even install a second heartbeat agent in addition to your original. You may wish to do this to split resources across machines, add fail-over redundancy, or to monitor hosts that are in a complete separate network segment.
Steps:
- Requirements
- Copying Files
- Installing ODBC Drivers
- Configuring the new local Heartbeat Instance
- Testing and final steps
Requirements
To install the Heartbeat agent, the new computer/machine must have the EventSentry Agent installed and must be able to successfully connect to the EventSenrty database port. You can double check your database settings in the EventSentry management console under Home > Actions and find your database action.
Copying Files
On your primary EventSentry server, open the installation directory (the default location is [c:\Program Files\EventSentry]) and copy all root-level files to a folder on the new machine. You do not need to copy any sub-folders in this directory; you only need to copy the files in the root folder. In our example, we’ll copy these files to a folder on the new machine named [C:\EventSentryTemp]. In addition, copy the Postgres ODBC Drivers installation files to the new machine. The default installation location for the Postgres drivers is [c:\Program Files\EventSentry\postgresql14]). Again you only need to copy the root files in the postgres folder, not any sub-folders.
NOTE: For older versions of EventSentry, the sub folder x64 (by default located in [c:\Program Files\EventSentry\x64]) must be copied to the new machine as well.
Installing ODBC Drivers
Now on the new machine, open the folder you copied your ODBC files to ([C:\EventSentryTemp\postgresql14] in our example) and run the ODBC Database drivers installer. At the time of this writing, the latest installer is called [psqlodbc_13-02-0000_setup.exe] but the latest version may differ depending on when new versions are released and what version of EventSentry you are using.
Configuring the new local Heartbeat Instance
On the new machine and from the temporary folder you created ([C:\EventSentryTemp] in our example) open the EventSentry GUI file ([eventsentry_gui_x64.exe])
In the GUI, from the left tree, select Heartbeat (1), then in the right panel select Install (2), select the folder you copied all of your files to (3) and click OK. (4)
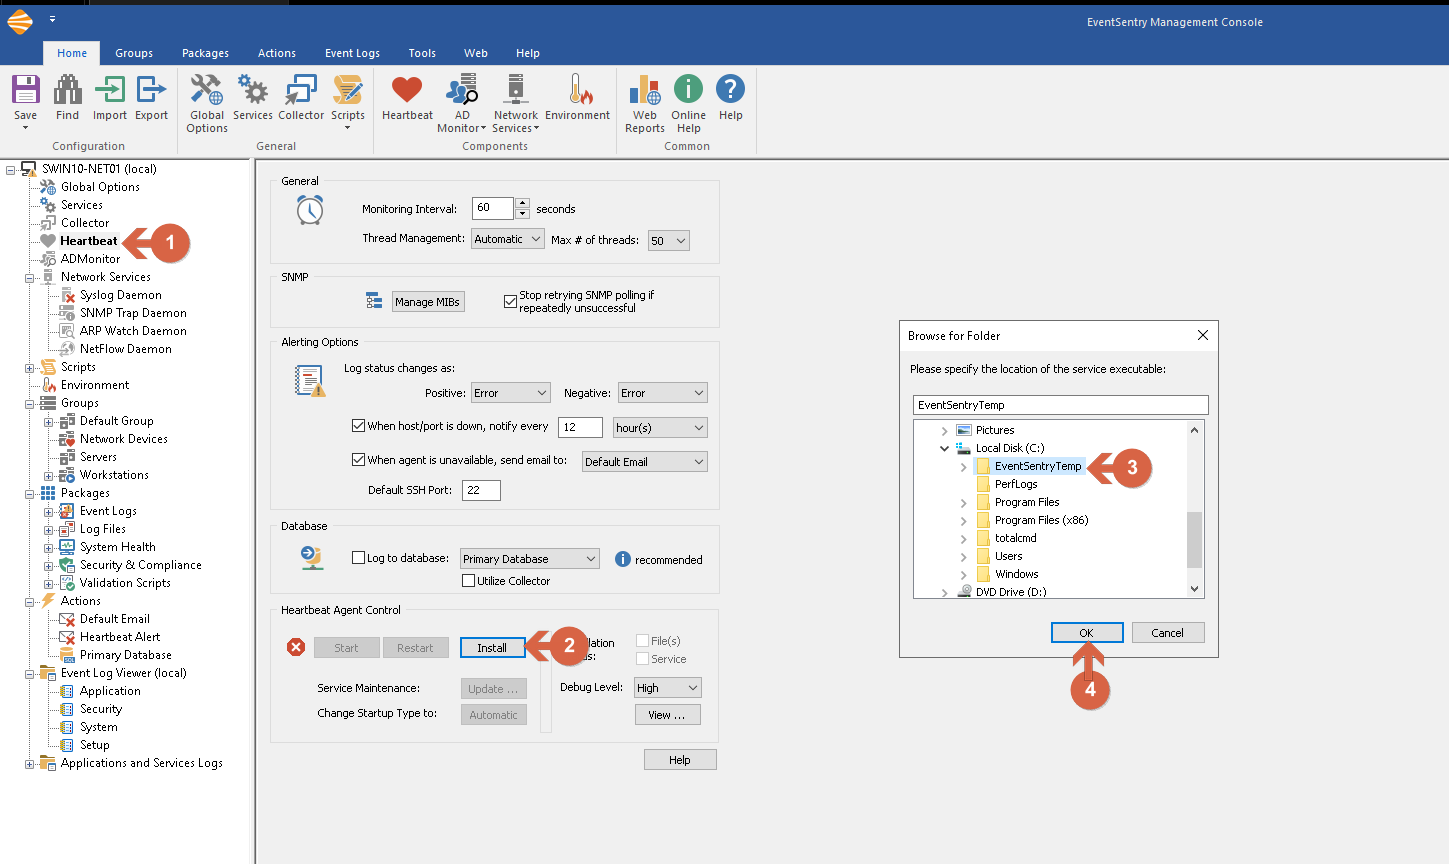
Opening the GUI and installing Heartbeat service
In the same panel on the right, make sure that the "Log to database" option is marked and Primary Database (or desired database) is selected (1), click save (2) and finally click on Start to start the newly installed Heartbeat service (3)
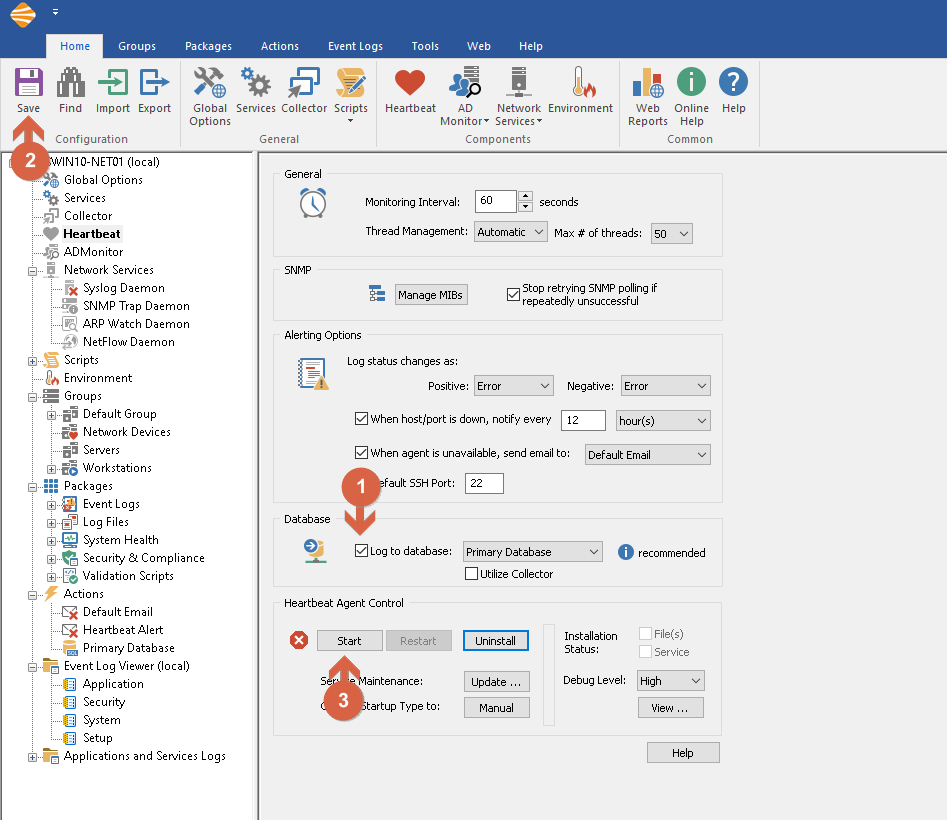
Check log to database and start the service
Testing and final steps
To test and confirm that the new Heartbeat agent is working, make sure that the original/primary Heartbeat agent service on your original server is stopped. Then open Webreports, and from the menu click "Features" (1), then click "Heartbeat" (2), and lastly click current. (3)
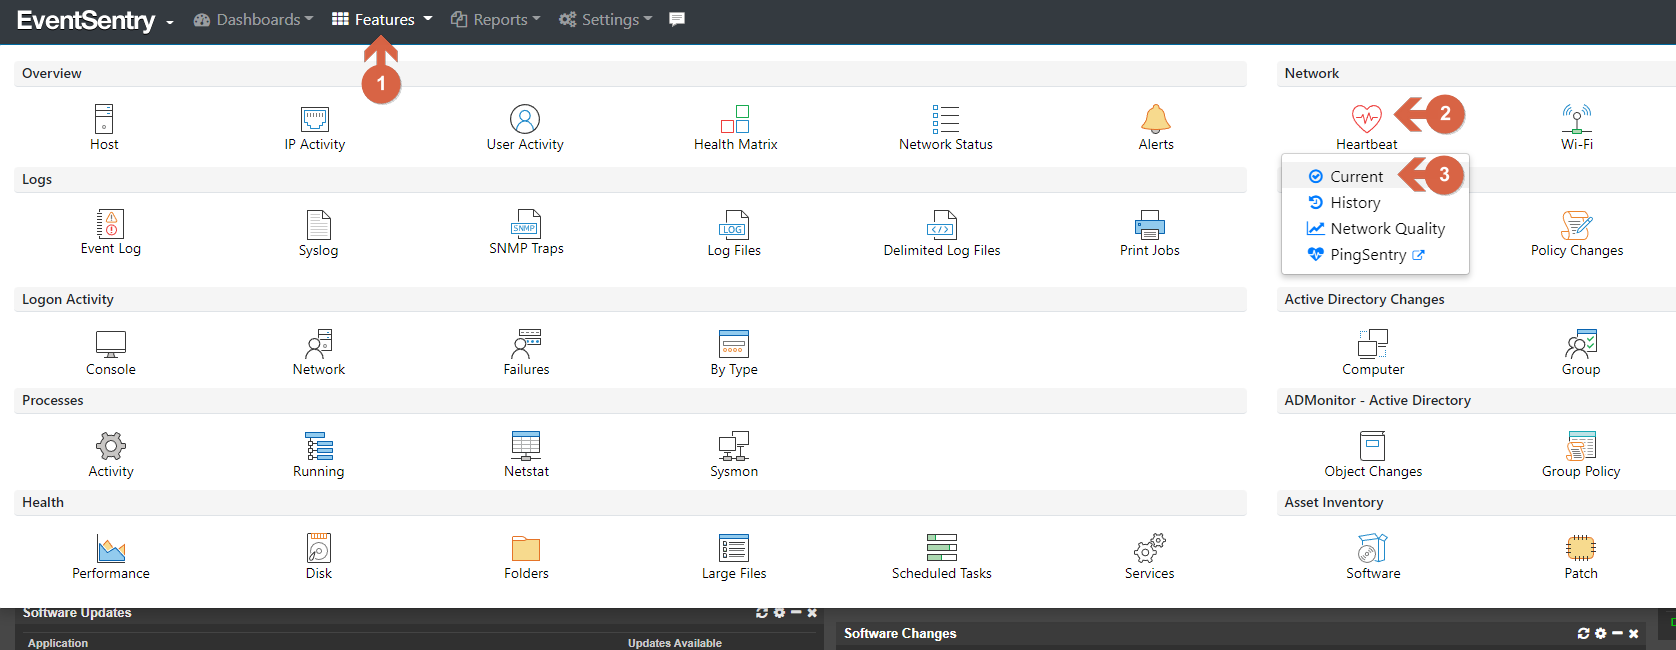
Checking Heartbeat
If installed successfully, the time stamp of your heartbeat results should update when you refresh the page as the new Heartbeat agent writes new data to the database.
If the new Heartbeat agent is intended to move resources out of the main EventSentry installation, and your original Heartbeat agent is no longer needed, set the old Heartbeat service to start as manual (1) and stop the service. (2) Otherwise, if you successfully tested your new Heartbeat agent you can start your original agent again and you should now have two functioning Heartbeat agents!
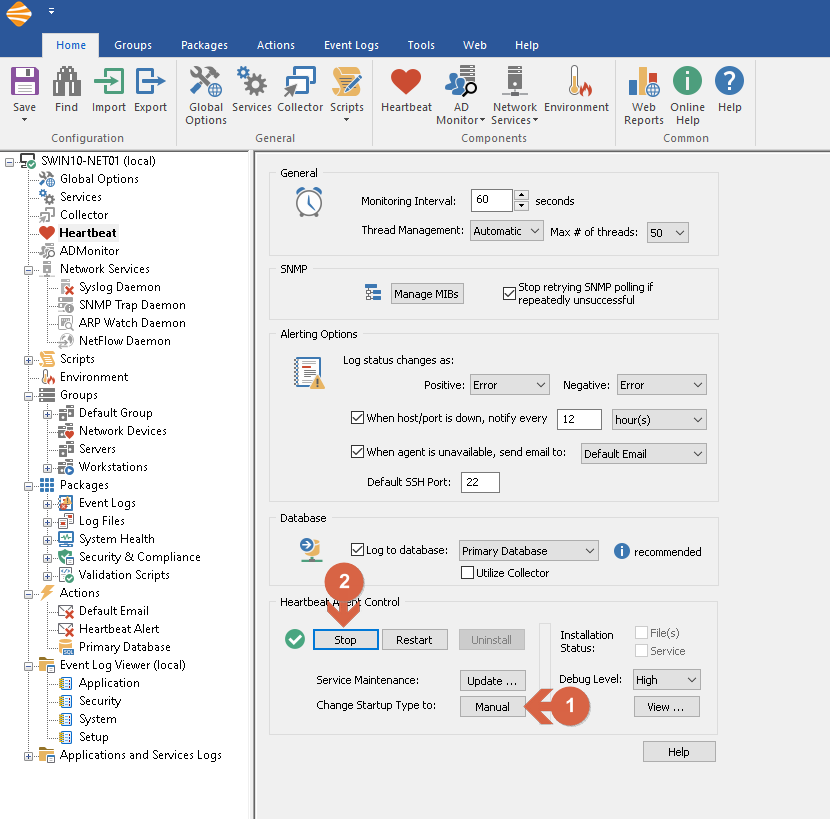
Disabling and Stopping Heartbeat service as needed