How do I migrate / move my EventSentry installation and PostgreSQL database to a new server?
To move EventSentry and Web Reports:
1) Export your current EventSentry settings from the Management Console toolbar by clicking Home > Export. Then transfer this file to your new server. Edit the file in a text editor such as Notepad and do CTRL+H (find and replace) and enter this as the Find value:
name of your old server
Then enter this as the Replace value:
name of your new server
Be sure to replace the examples in bold with the real values of your old server name and your new server name. Click "replace all" and save the changes.
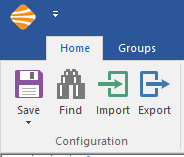
Exporting your configuration.
2) Run the EventSentry installer on the new server. You can download the latest installer by logging into your licensing account at https://store.netikus.net/account and clicking "downloads" on the left. While signed in, you can also click "license keys" on the left and download your license file in case the installer asks you to provide your license. While running through the setup wizard, be sure to make a note of the database user passwords you set as you will need these later. When the installer is finished and it opens the EventSentry console, click Home > Import and choose the file from step 1.
3) Open the Windows Services Manager (start > run > services.msc) on the old server and locate the EventSentry Heartbeat Monitor service. Double-click it and open the "Log on" tab. Make note of which account this service is running under, and ensure that the same account is running the EventSentry Heartbeat Monitor service on your new server.
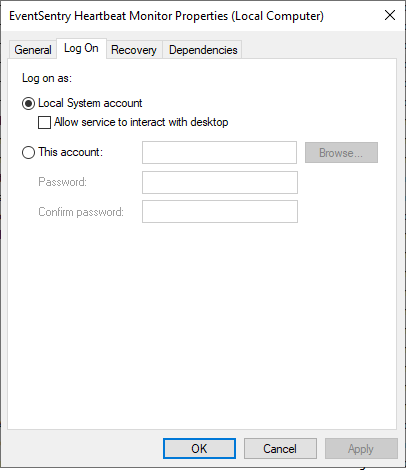
Checking the Heartbeat service's logon settings.
4) Copy the Web Reports users, reports, jobs, and settings from your old server by copying the entire "C:\Program Files\EventSentry\WebReports\conf" folder. After stopping the "EventSentry Web Reports" service on the new server, paste and overwrite the folder into the same location on the new server. Make sure you copy and paste "C:\Program Files\EventSentry\WebReports\conf" and not the "C:\Program Files\EventSentry\WebReports\web\conf" folder. Be sure to start the Web Reports service again once completed.

Copying your Web Reports settings.
5) Stop the EventSentry Heartbeat service on the old server and leave it stopped so that you do not end up with duplicate heartbeat data and alerts.
6) On the new server use the EventSentry console toolbar to click Home > Collector, and update the name or IP in the hostname line to match the name or IP of your new server. Save your changes then click the "restart" button on the collector page to restart the collector. Then use the toolbar to click Groups > Push Configuration > Go and then click Groups > Manage (dropdown) > Restart Agents > Go.
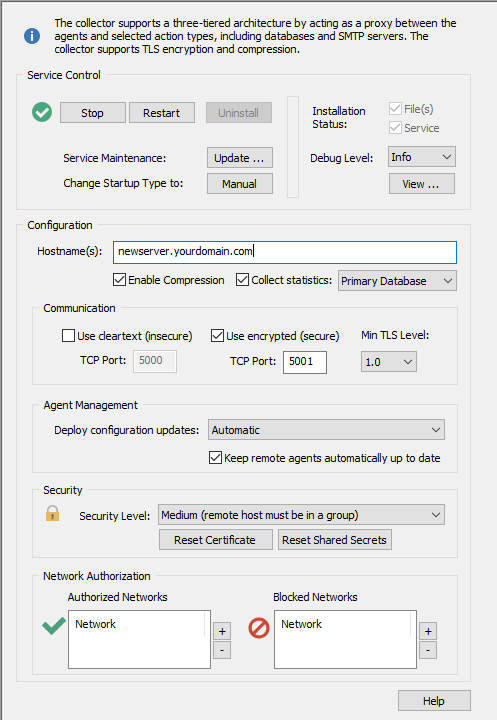
Updating your collector settings.
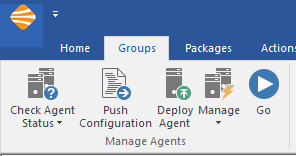
Pushing your configuration and restarting your agents.
7) Open your database action, which by default is under Actions > Primary Database, and click the "Create" button. Make sure these settings are pointing to either your newly installed database on the new server (if you plan on starting over with a new database) or the old database on the old server (if you plan on using the old database until you migrate it over). Then click OK and click the Test button to ensure you get a successful test.
8) Open Web Reports and click Settings > Profile Editor. Scroll down to the "Database Connection" settings. Again, make sure this is pointed to either your newly installed database on the new server (if you plan on starting over with a new database) or the old database on the old server (if you plan on using the old database until you migrate it over). Click the "Test Connection" button to ensure that the test is successful. Finally, scroll to the bottom of the page and click Submit to save the changes.
9) If applicable, set all of your Syslog, SNMP trap, and Netflow senders to forward to the new server instead of the old server. If you're not sure which devices were already sending Syslog or SNMP Traps you can check in the web reports under Features > Syslog, Features > SNMP Traps, or Features > Netflow you can search the past few days and review the list of senders to see which senders need to have their destination settings updated.
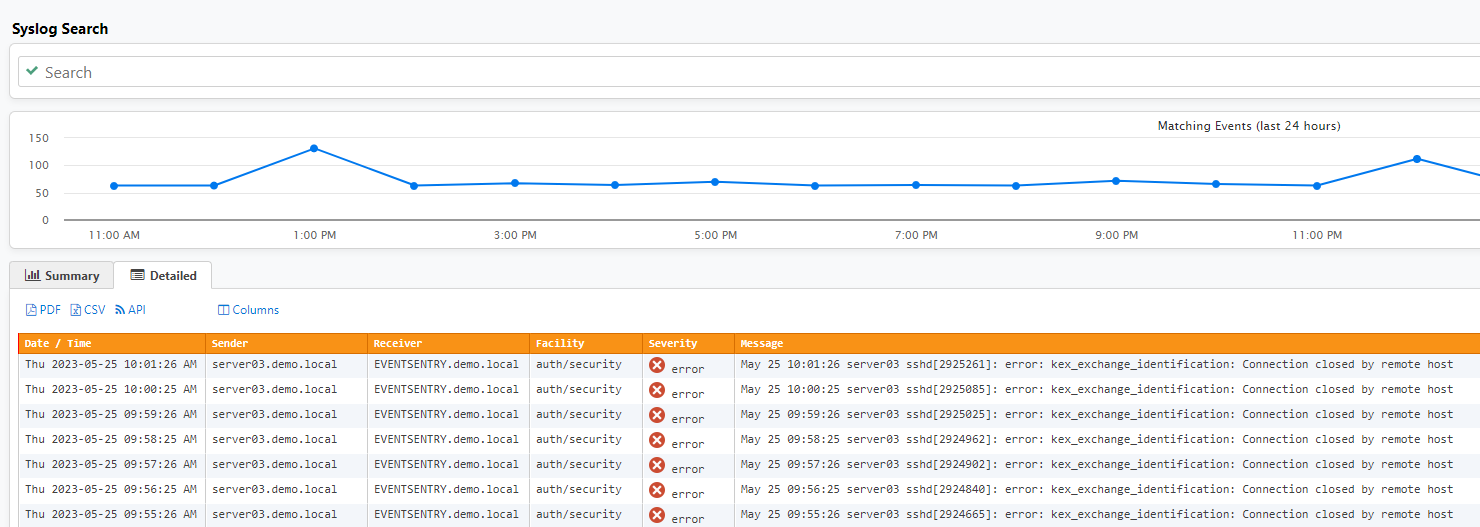
Checking Web Reports for Syslog senders.
--PLEASE NOTE: At this point, your EventSentry and Web Reports installation will be on the new server. If you plan to migrate your old Postgres database as well, it is recommended that you wait 1-2 days between moving EventSentry and moving the database in case any issues arise in the meantime.
To move the PostgreSQL database:
1) On your new EventSentry server, open the EventSentry Management Console to Home > Services, and click the Stop buttons next to each service EXCEPT for the database service.
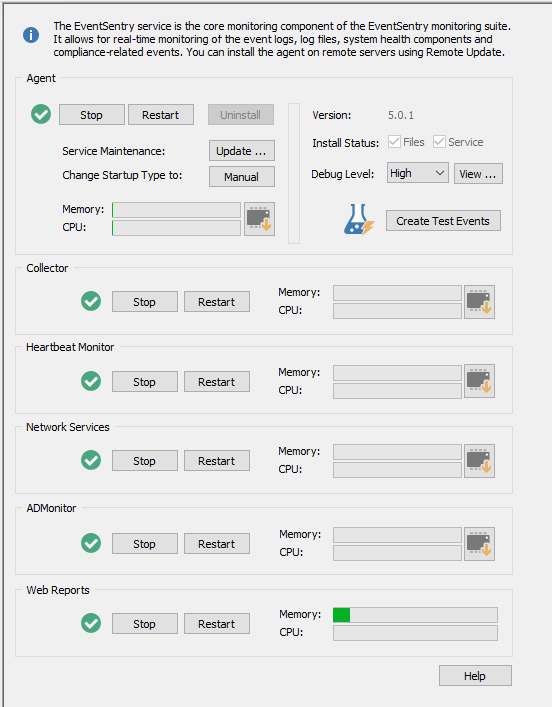
Stopping the EventSentry services.
2) Still on the new server, stop all of your agents by clicking Groups > Mange (dropdown) > Stop Agents > Go .
3) From the old server, back up the database using this KB article http://www.eventsentry.com/kb/235. Move your resulting backup file to the new server and use the restore instructions from the same article to load the database onto the new server. When restoring, if you already have a database named "EventSentry" on your new server, you can adjust the database name in the commands to something new.
4) Copy C:\Program Files\EventSentry\data14\postgresql.conf and C:\Program Files\EventSentry\data14\postgresql_eventsentry.conf from the old server to the new server, overwriting the copy on the new server. Restart the "EventSentry Database v14" service on the new server when you are finished. All the rest of the steps will be on the new server.
5) Select your database action in the EventSentry console and click the Create button in the upper right corner of the settings. Change the server, database name, and/or port settings as needed to point to the database you just restored in step 3 then click OK. Then click the Test button to ensure that the test is successful.
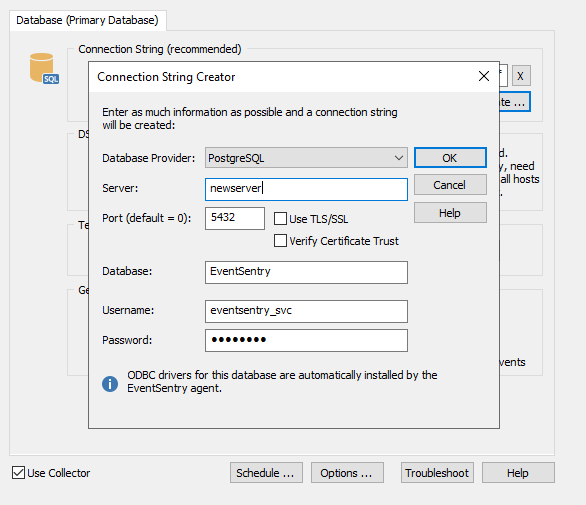
Changing your Primary Database settings.
6) Save your new settings from Home > Save.
7) Undo step 1 by clicking the Start buttons instead of the Stop buttons in the Home > Services page. Start all your agents with Groups > Manage (dropdown) > Start Agents > Go.
8) Open Web Reports and click Settings > Profile Editor. Edit the server name or IP in the Database Connection settings to the name or IP of your new server. Click the "Test Connection" button to ensure that the test is successful. Finally, scroll to the bottom of the page and click Submit to save the changes.
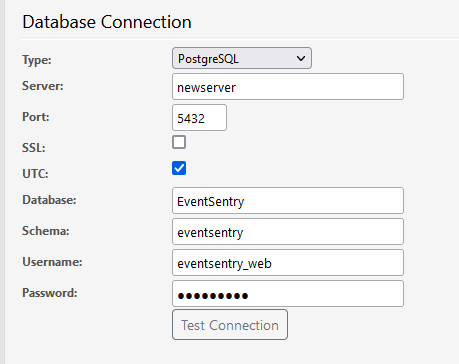
Changing your Web Reports settings.
If you have any questions or any issues arise during migration, please feel free to open a support ticket at support@netikus.net and we will be happy to help.