How to correctly add a SNMP-capable device to EventSentry?
EventSentry can retrieve various device information such as disk space & performance metrics via SNMP. This guide shows how to correctly configure and add a device to be monitored via SNMP.
- Check/Enable/Configure Device to use SNMP
- GUI: Adding devices
- Verifying SNMP configuration
- Viewing information in the web reports
- Other SNMP-related resources
Check/Enable/Configure Device to use SNMP
Every vendor/model has their own different way of configuring SNMP (first ensure that the device even supports SNMP). We used a UniFi ER-4 router devices for this example, but you should check the documentation and/or contact the device manufacturer for more details.
Depending on the brand and device model, it may be configurable via Web or via Console (or sometimes both). If the device supports SNMP v1 or v2c then the most important setting will be the community, which is the equivalent of a "password". If you want to keep your network secure you should use a complex name and avoid community names like "public" or "test". For this example we used whitepony. Remember this, since we will be using it to access the device information later.
Note: If your device supports SNMP v3, then you will be required for additional settings.

Example of SNMP configuration via Web. This will vary for every brand and model of device.
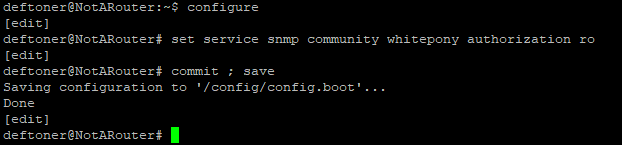
Example of SNMP configuration via CLI/SSH. This will vary for every brand and model of device.
GUI: Adding devices
For this example we are adding the device to the pre-existent Network Devices group. We are adding just one device in this example, but devices can also be added in bulk by using the import hosts option that lets you import from a file, network scan and so on.
Right-Click on Network Devices group (1), click on Add host / IP Address (2). In the Add Host Dialog, enter a desired name (Primary Router for this example) (3) and enter the IP Address of the device, 172.16.24.1 in this example (4). Click on OK (5). Right click on the recent added device (6) and click on Set Authentication (7) Click on SNMP tab (8), Enter the desired name for this credential (9) and under Username / Community enter the configured community, Whitepony for this example. (10). Then Click on Add and OK.
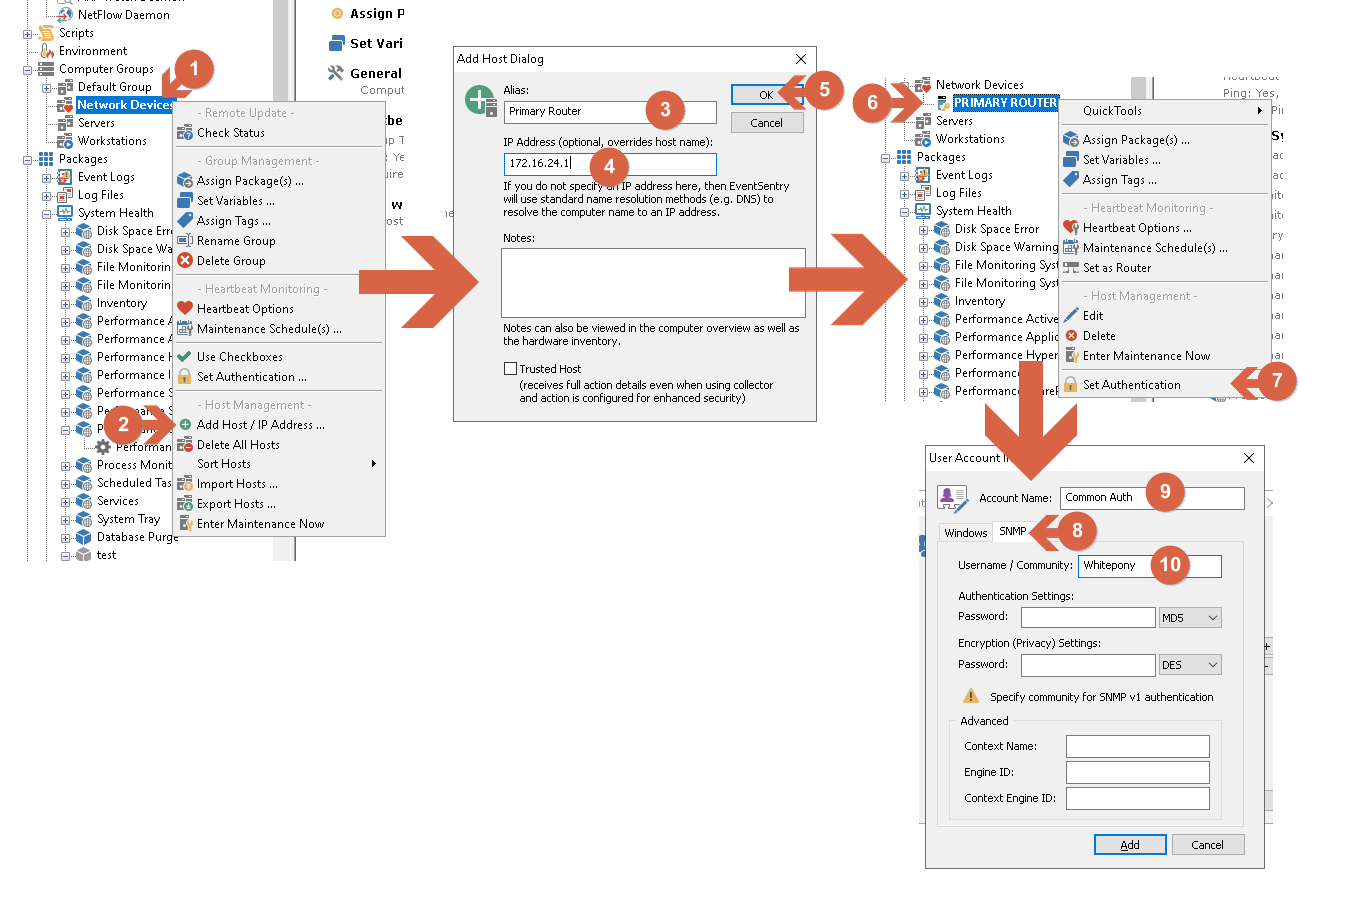
Adding Device and SNMP credentials.
Important: Remember to save the configuration by going to the top left option Home section and click on Save in the EventSentry Management Console.
Verifying the SNMP configuration
At this point the device is added to EventSentry and credentials have been assigned to it so that the SNMP information can be accessed. We will now check that the correct package is assigned, configured and perform a basic test to ensure that the device is accessible. The default package Performance System queries performance data of devices and sends it to the database. This package is globally assigned by default but we are going to double check if is assigned and configured as well as verify access to the device.
By left clicking on the devices that we just added (1), on the right windows, a list of assigned packages will show up. Double check from the list that the Performance System package is assigned and enabled and click on it to got to the package (2).
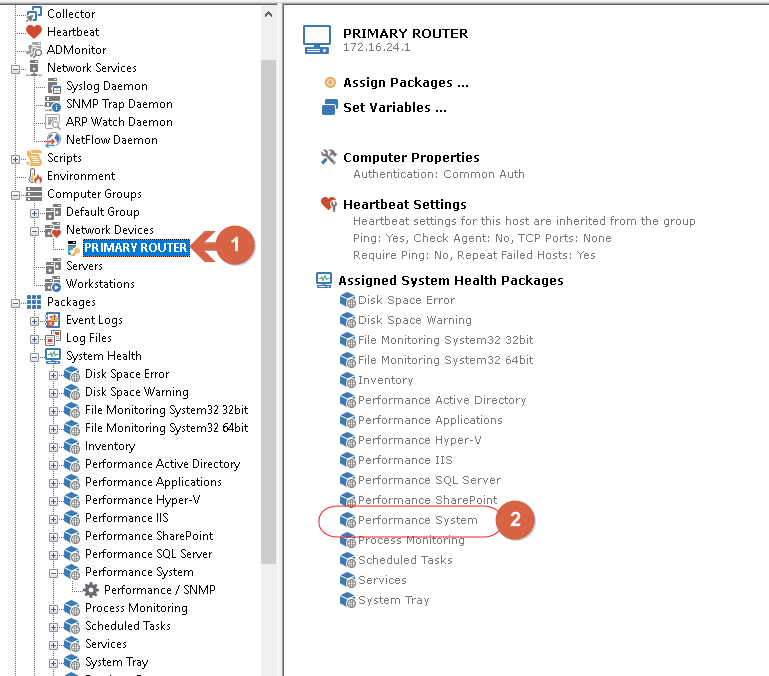
Checking Assigned "Performance System" package
To check the connection to the device, after the Performance System package was clicked, left-click on the Performance / SNMP item inside the package (1), on the right window double click on network (2). From the new window Performance Monitoring Details, change from Windows Counter to SNMP Counter (3) and click the Test Button.

Step 1: Testing connection to a device
After clicking the Test Button, a new windows called SNMP Test will show up. From he host list select the host that we just created (1) and click OK (2) After clicking on OK, the bottom of the windows will first display the OS/Device Model (3) and shortly after that, data should be pulling from the device (4)
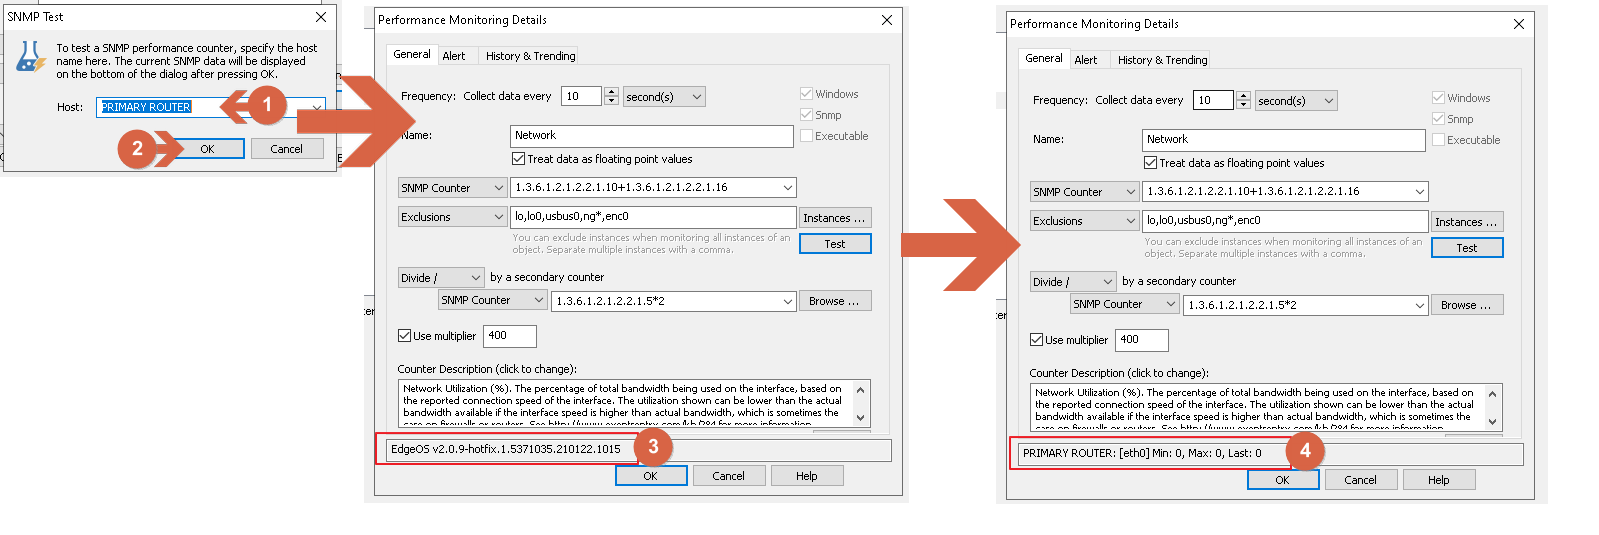
Step 2: Testing connection to a device
If the Waiting for data from remote host ... message shows and does not change in a couple of seconds then the device might be not accessible. Check the local and remote firewall configuration and verify that the community or username/password configuration of the device match the configuration in EventSentry.
Viewing information in the web reports
If everything was configured correctly then EvenSentry should have collected some information from the device(s), which should in turn be available in the web reports. Open the web reports and navigate to Features -> Host.
From the host list, click on Change (1) and select the just added device. A page including information from the device will show up, with data like interfaces, ips, Operation system and so on. (2) Click on Performance Tab to see more information such as CPU, Memory and Network usage. (3)
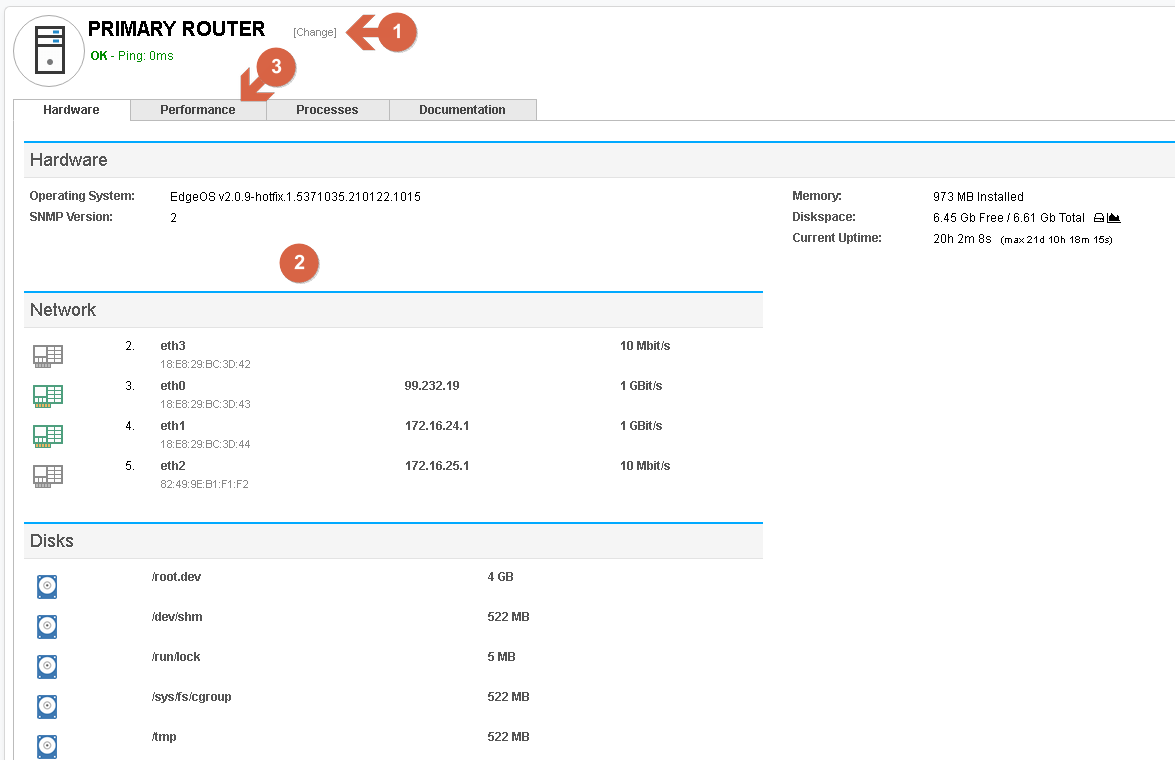
Viewing information in the web reports - Global
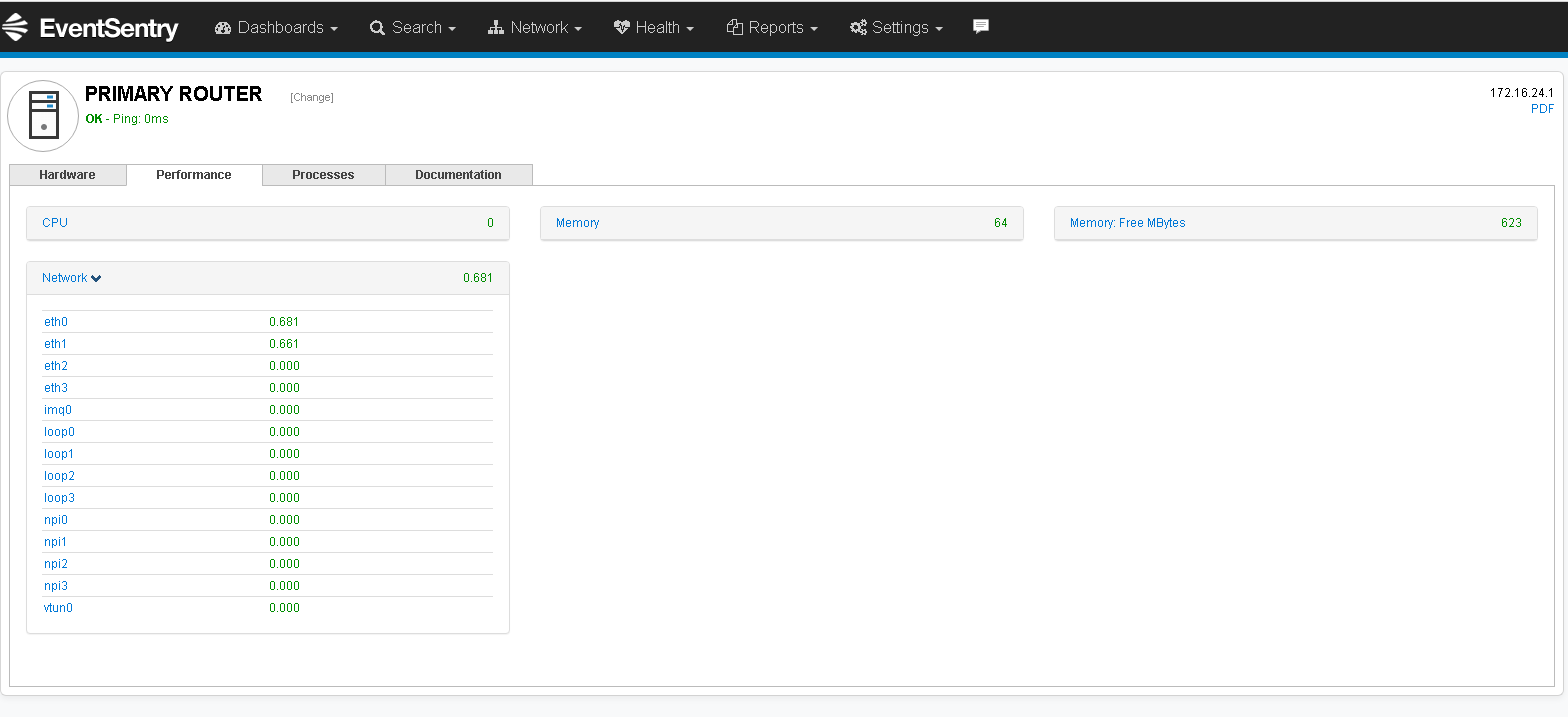
Viewing information in the web reports - Performance
Other SNMP-related resourcces
KB 040 - Which ports must be open on the firewall?
KB 191 - Can I monitor devices using SNMP?
KB 199 - Can I monitor Cisco devices (e.g. switches and routers) with EventSentry?
KB 281 - How do I enable SNMP on an Ubuntu Linux host so that I can monitor system metrics with EventSentry?
KB 282 - How do I enable SNMP on a CentOS Linux host so that I can monitor system metrics with EventSentry?