Remote Update Utility
Application Scheduler (Step 4 of 5)
Setting up a schedule
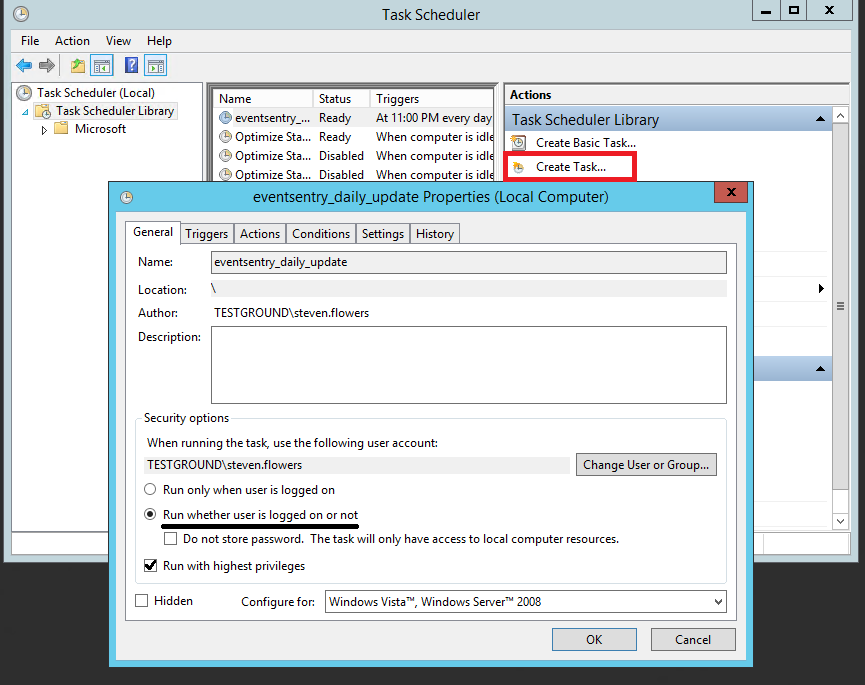
To get the most out of the Remote Update Utility, we will automate the update process using the batch script we've already created using the Windows Scheduled Tasks. You can access the scheduler by navigating to the Control Panel -> Administrative Tools and clicking Scheduled Tasks. We will then add a new scheduled task were we can specify a name for the schedule and make sure that "Run weather user is logged on or not" is checked.
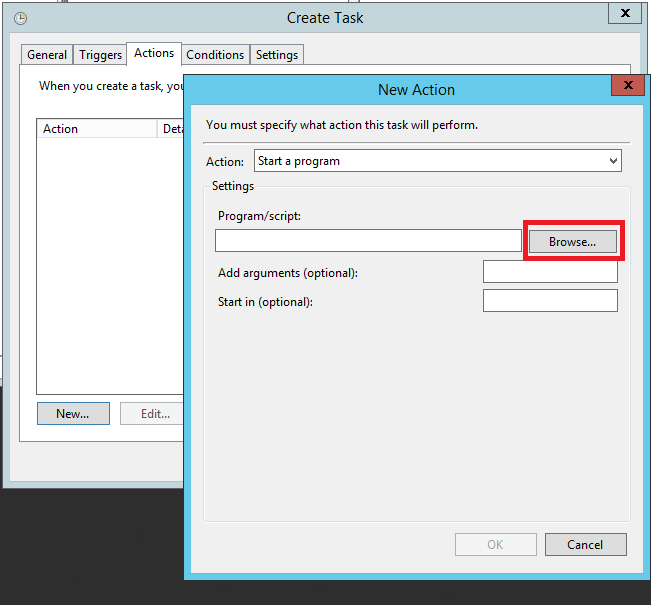
To assign the script we created earlier, click on the "Actions" tab and then click "New".
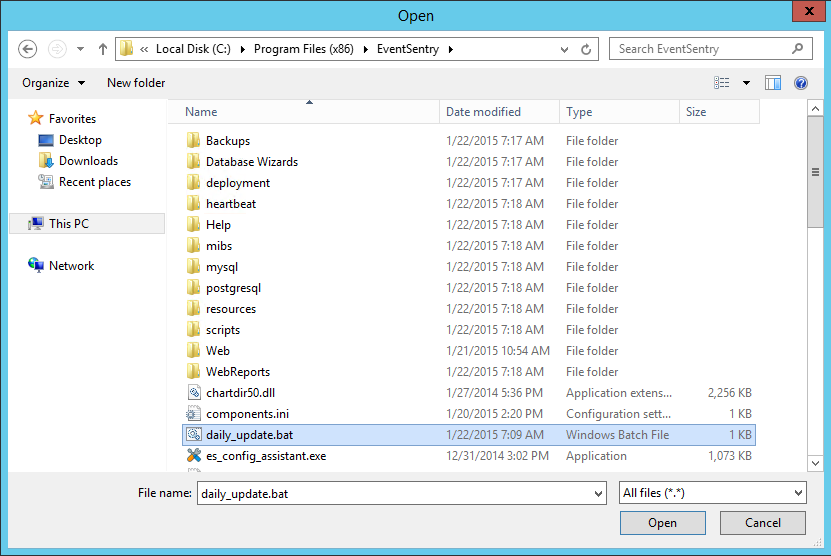
Here we will locate the batch file we created.
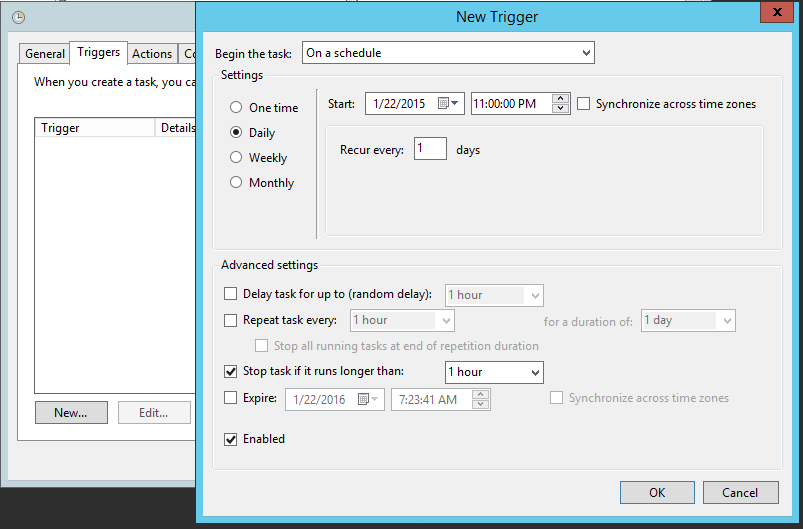
We recommend scheduling the script to run daily so any changes made in the management console throughout the day will be pushed to your remote host(s). We will also set the start time to 11:00 PM so that it doesn't potentially interfere with network traffic.
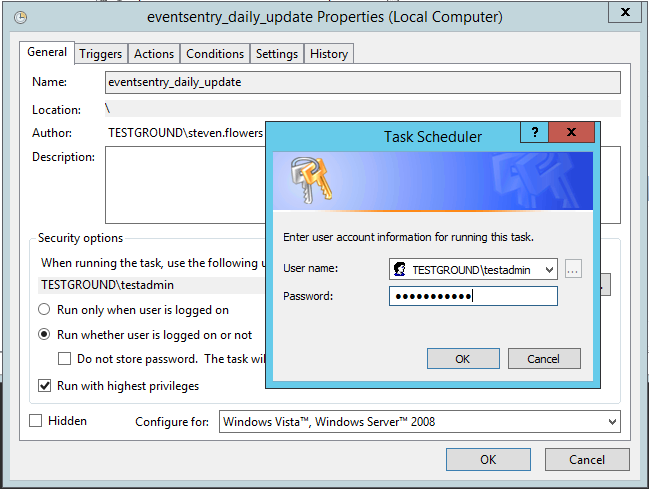
Finally, enter a user account that you would like the batch script to run under. If you set custom authentication (Set Username/Password) for a group or computer then it is important that you set the task to run under the same user account you used to set the username and password.
Then you can click OK and that will close the "Create Task Wizard".
- Updated on: 2015-01-22
- Skill Level: Intermediate
- LEFT/RIGHT arrow keys for navigation