Almost every company which runs Microsoft Exchange Server needs to make port 443 available to the Internet in order to provide their users access to email via their mobile devices or OWA.
Since both OWA & ActiveSync utilize Active Directory for authentication, exposing OWA/ActiveSync to the Internet indirectly exposes Active Directory as well. While user lockout policies provide some protection against brute force attacks, additional protection methods should be employed. Furthermore, password spraying attacks may be use to circumvent lockout policies – something that would be more likely to succeed in larger organizations.
With the proper auditing enabled (Logon/Logoff – Logon (Failure)) and EventSentry installed however, we can permanently block remote users / hosts who attempt to log on too many times with a wrong password. Setting this up is surprisingly simple:
- Windows: Enable (or verify) Auditing
- EventSentry: Setup action which creates firewall block rule
- EventSentry: Setup filter looking for 4625 Audit Failure events
Bonus: This procedure works with the free version of EventSentry (EventSentry Light) and can be applied to any IIS-based web site which uses authentication.

Windows Auditing
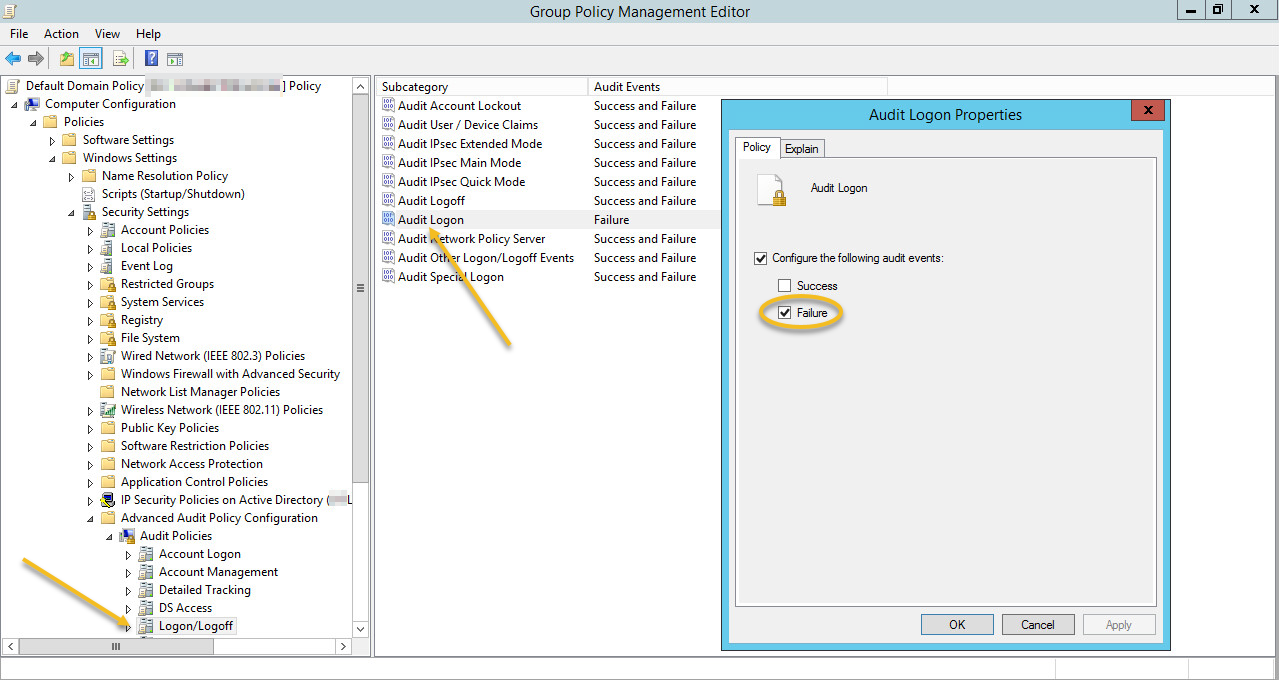
In the group policy settings that affect the server running OWA, make sure that auditing for Failure events in the Audit Logon sub category of the Logon/Logoff category is enabled (of course you can audit success events as well). If you are running the full version of EventSentry v3.4 or later then you can verify all effective audit settings on the Audit Policy Status page for example.
Creating an Action
Since event 4625 contains the IP address of the remote host, the easiest way to subsequently block it is to run the netsh command. In the management console, create a new action by clicking on the “Action” header in the ribbon and selecting the process action as its type. See the screenshot below:
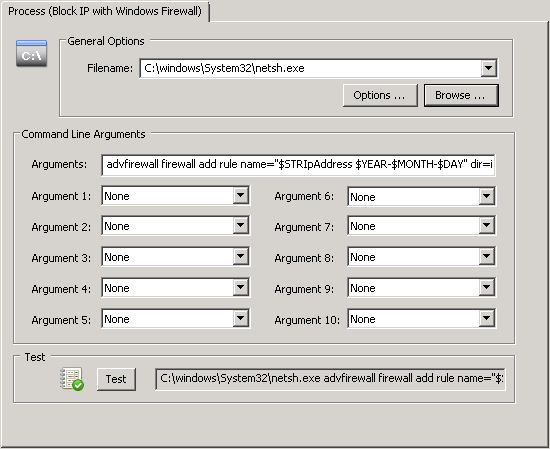
The following command line will work in EventSentry v3.4 and later:
advfirewall firewall add rule name="$STRIpAddress $YEAR-$MONTH-$DAY -- automatic block by EventSentry" dir=in interface=any action=block remoteip=$STRIpAddress/32
If you are running EventSentry v3.3 or earlier then you will need to use the $STR20 variable instead:
advfirewall firewall add rule name="$STR20 $YEAR-$MONTH-$DAY -- automatic block by EventSentry" dir=in interface=any action=block remoteip=$STR20/32
The difference here is that v3.4 and later can refer to insertion string variables by name, making the action more universal and potentially applicable to any event that uses the same field name.
When this action is triggered, it will extract the IP address from the event and block it from the system entirely.
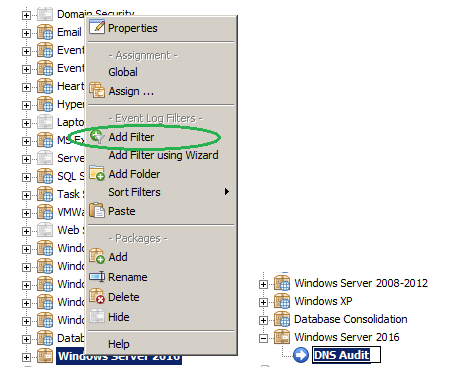
Creating a Filter
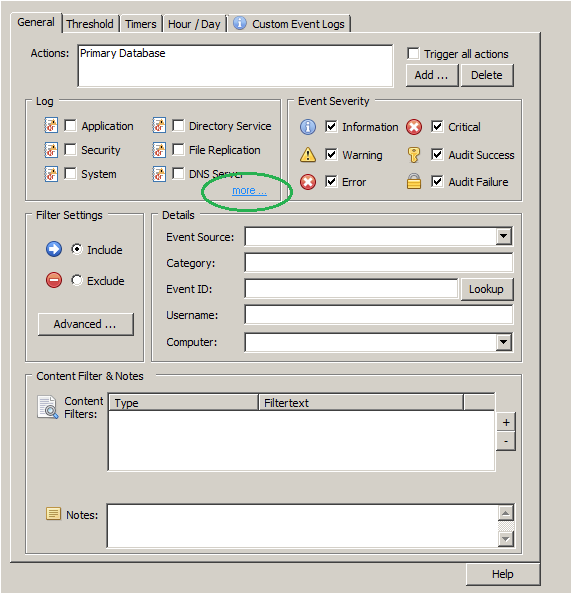
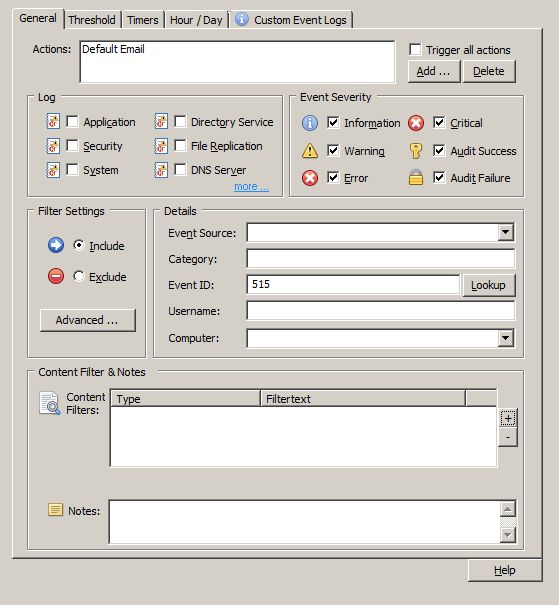
Create an event log filter which matches Audit Failure events from the Security event log with event id 4625, where insertion string 19 matches the w3wp.exe process (C:\Windows\System32\inetsrv\w3wp.exe). This ensures that only users accessing the host via the web will be subject to blocking. The screenshot below shows the configuration:
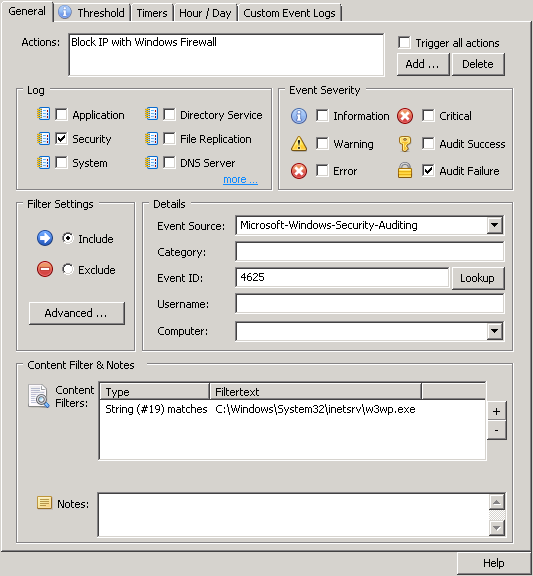
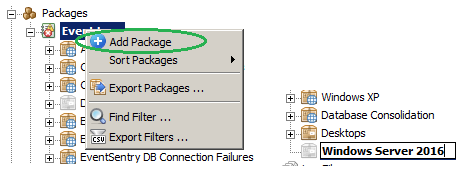
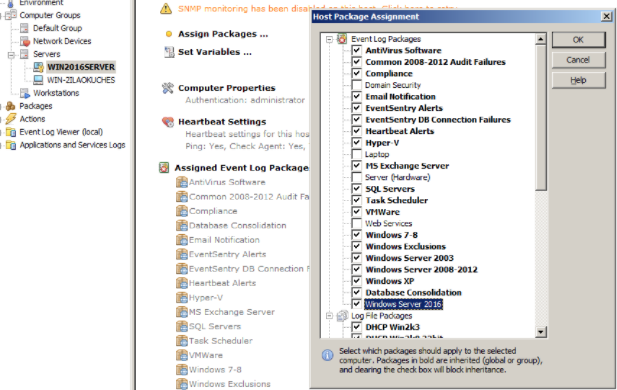
This filter can either be added to an existing package or added to a new package that is assigned only to the Exchange server. If the filter is added to an existing package that applies to servers other than the Exchange server, then the computer field of the filter can be used to ensure the filter is evaluated only on the desired host. Select the action created in the previous step.
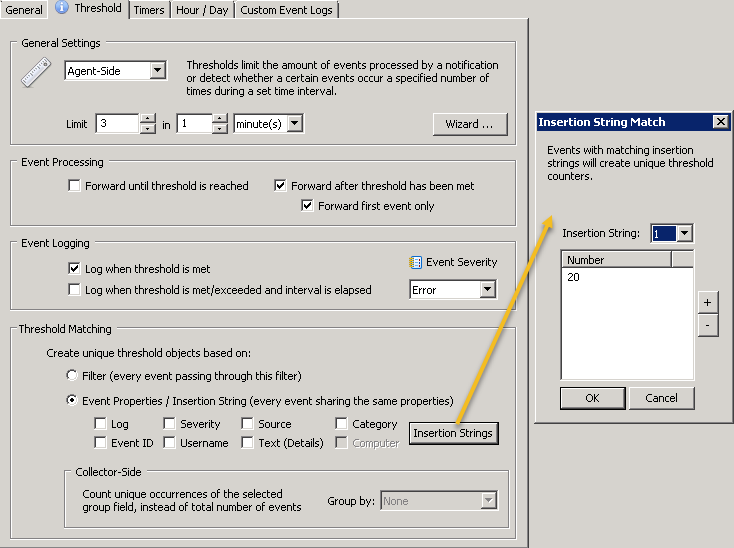
Since users may occasionally enter an incorrect password I recommend setting up a threshold so that remote IPs are only blocked after 3 or more failed logon attempts. Threshold are configured by clicking on the “Threshold” tab (see the blue “i” above) and an example configuration is shown below. Feel free to adjust the threshold to match your users ability to enter their password correctly :-). Insertion string 20 – which represents the IP address of this event – was selected in the threshold matching section to ensure that each IP address has its own, unique threshold. Note: The event logging settings shown are optional.
Save/deploy or push the configuration to the mail server.
Considerations
Triggering a system process from external input is something we should always do with caution. For example, if Windows has an upper limit to the maximum number of rules that can be added, then an attacker could launch a DoS attack IF they had the ability to launch attacks from different IP addresses. Launching a DoS attack from the same IP won’t be possible once they are blocked. You can mitigate this risk by applying a threshold to the EventSentry action calling netsh.exe, for example by limiting it to 100 / hour. This would still provide sufficient protection while also ensuring that only 100 rules could be added per hour (thresholds can be set by clicking on the “Options” button on an action). A regular audit of the netsh execution (e.g. via Process Tracking) would quickly show any sort of abuse.
Over time the number of firewall rules added to the mail server could become rather large, which is why the rules are created with a date appended. This makes managing these rules easier, and the name can also be adapted in the action by changing the “rule name” parameter. The screenshot below shows the inbound firewall rules after two IPs have been blocked:

If manual cleanup of firewall rules is not desirable or an option, then the netsh command can also be wrapped into a script which would erase the firewall rule again after a timeout (e.g. 15 minutes). The script could look like this:
"C:\windows\system32\netsh.exe" advfirewall firewall add rule name="%1 %2 -- automatic block by EventSentry" dir=in interface=any action=block remoteip=%1/32
timeout /t 900
"C:\Windows\system32\netsh.exe" advfirewall firewall delete rule name="%1 %2 -- automatic block by EventSentry"
In this case you would call the wrapper script instead of the netsh.exe process directly (General Options – Filename) and use the string below as the arguments:
$STRIpAddress $YEAR-$MONTH-$DAY
To keep things simple you can just make the script an embedded script (Tools menu) and reference the script. The timeout value (120 in the above example) is the duration seconds the remote IP will be be blocked. If you want to block the IP for an hour then you would set the timeout value to 3600 instead. When going this route I strongly suggest clearing both event log check boxes in the Options dialog of the action.
Happy Blocking!